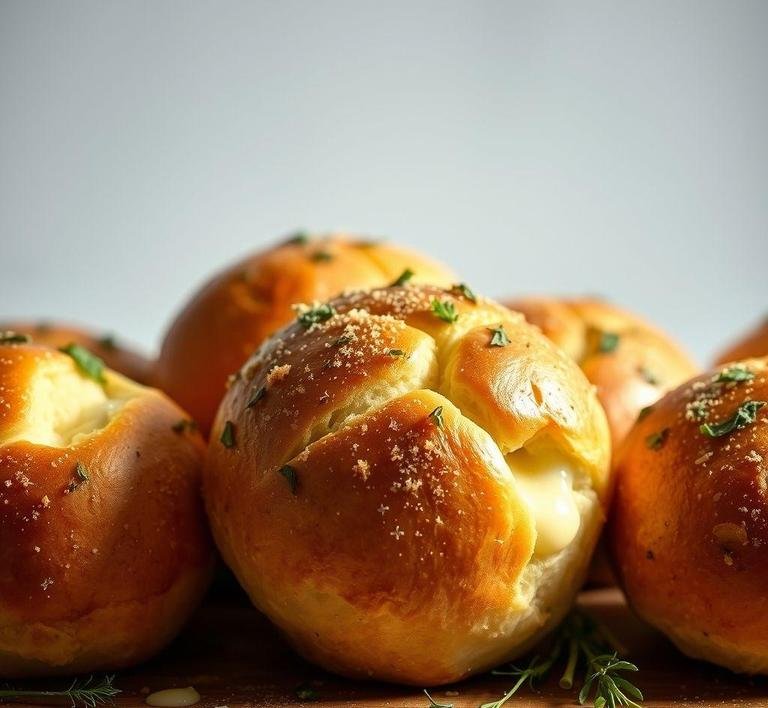
Mary Berry’s Tear and Share Cheese and Herb Rolls are a delightful savory bread dish that’s as inviting as it is delicious. These rolls are essentially soft, pillowy dough spirals filled with cheese, fresh herbs, and sometimes a touch of garlic or mustard, baked close together in a tin so that they rise and bake into each other. The result? A golden, cheesy top with soft interiors that pull apart beautifully-hence “tear and share”.
It’s a recipe that marries the fluffy texture of enriched bread with the sharp, salty bite of cheese and the aromatic lift of fresh herbs. Think of it as a hybrid between a cheesy pull-apart bread and herby dinner rolls. It’s the kind of bake that looks impressive on a table but is surprisingly simple to make, especially when following Mary Berry’s signature straightforward method.
Mary Berry’s Tear And Share Cheese And Herb Rolls Recipe
Ingredients Needed
Here’s what you’ll need to gather before you start. Mary Berry’s recipe uses classic pantry and fridge staples, so there’s a good chance you already have many of these on hand.
For The Dough
- 450g (3½ cups) strong white bread flour
- 1 tsp salt
- 1 sachet (7g) fast-action dried yeast
- 1 tsp caster sugar
- 300ml (just over 1¼ cups) warm milk (not hot!)
- 50g (¼ cup) unsalted butter, melted
- 1 medium egg, lightly beaten
For The Filling
- 100g (about 1 cup) mature cheddar cheese, grated
- 50g (½ cup) Parmesan cheese, finely grated
- 2 tbsp chopped fresh parsley
- 1 tbsp chopped fresh chives
- 1 tsp chopped fresh thyme (optional)
- Freshly ground black pepper to taste
For Finishing
- 1 egg yolk mixed with 1 tbsp milk (for egg wash)
- Extra herbs or cheese for sprinkling on top (optional)
Note: You can get creative with the herbs or even switch up the cheese-Gruyère, mozzarella, or Red Leicester are also lovely options.
Equipment Needed
To ensure smooth sailing during your baking session, make sure you have the following equipment on hand:
- Large mixing bowl (or a stand mixer with a dough hook)
- Measuring scales or cups
- Measuring spoons
- 1 x 23cm (9-inch) round deep cake tin or springform pan
- Small bowls for ingredients
- Pastry brush (for egg wash)
- Clean kitchen towel or cling film (for covering dough)
- Wire cooling rack
Optional but helpful:
- Dough scraper
- Digital thermometer (for checking milk temperature)
Instructions To Make Mary Berry’s Tear And Share Cheese And Herb Rolls
Let’s walk through the process step by step. Don’t worry-it’s not as daunting as it may seem. The key is to take your time and enjoy the process. Here’s how to do it:
Step 1: Make The Dough
- In a large bowl, combine the flour and salt. On one side of the bowl, add the yeast; on the other side, add the sugar (this keeps the yeast and salt from direct contact too early).
- Mix the warm milk with the melted butter and lightly beaten egg, then pour into the flour mixture.
- Stir with a wooden spoon or mix with a stand mixer fitted with a dough hook until it comes together into a soft dough.
- Knead by hand on a floured surface for about 10 minutes or let your mixer knead for 5 minutes until the dough is smooth and elastic.
- Place the dough in a lightly greased bowl, cover with a kitchen towel or cling film, and let it rise in a warm place for about 1 to 1½ hours, or until doubled in size.
Step 2: Prepare The Filling
While the dough is proving, mix together the cheddar, Parmesan, and chopped herbs in a bowl. Add a touch of black pepper for a bit of zing. Set this aside.
Step 3: Shape The Rolls
- Once the dough has doubled in size, punch it down gently to release air.
- Roll it out into a large rectangle-roughly 30x40cm (12×16 inches)-on a lightly floured surface.
- Evenly sprinkle the cheese and herb mixture over the surface of the dough.
- Starting from the long edge, roll the dough tightly into a log (like you would for cinnamon rolls).
- Slice the log into 12 equal pieces and arrange them, spiral side up, in a greased round tin. Leave a bit of space between each roll so they can rise and bake into each other.
Step 4: Final Rise
Cover the tin loosely and let the rolls prove for another 30-40 minutes until puffy and touching.
Step 5: Bake
- Preheat your oven to 200°C (180°C fan) / 400°F / Gas Mark 6.
- Brush the tops of the rolls with the egg wash for a glossy finish.
- Bake in the center of the oven for about 25-30 minutes, or until golden brown and well risen. The cheese should be bubbling, and the tops should sound hollow when tapped.
- Remove from the oven and cool in the tin for 5-10 minutes, then transfer to a wire rack. Best served warm!
Tips And Tricks
- Temperature Matters: When activating yeast, make sure your milk is warm (around 37-40°C or 98-104°F), not hot. Too hot and it kills the yeast; too cold and the dough won’t rise well.
- Proofing Shortcut: If your kitchen is cold, pop the covered dough into your oven with just the light on-it creates a gentle warmth that helps the dough rise.
- Cheese Choices: Use strong cheeses for maximum flavor. A sharp cheddar or a mix of cheeses gives a wonderful depth. Avoid very soft cheeses, as they can make the rolls soggy.
- Storage: These rolls are best fresh, but you can reheat them gently in the oven the next day. You can also freeze them after baking-just reheat from frozen for a quick treat.
- Get Creative: Add finely chopped sun-dried tomatoes, caramelized onions, or even a sprinkle of chili flakes for a twist.
Mary Berry’s Tear and Share Cheese and Herb Rolls are a masterclass in simple baking elegance. They are soft, cheesy, herby, and impossibly moreish-the kind of bake that vanishes minutes after being placed on the table. Whether you’re making them for a party, picnic, or Sunday brunch, these rolls are bound to impress and satisfy.
With a little patience and some simple ingredients, you can bring the warmth and charm of a Mary Berry classic right into your own kitchen. So, roll up those sleeves, get your dough rising, and enjoy the deliciously comforting aroma of cheese and herbs filling your home.
Easy Recipe Variations For Mary Berry’s Tear And Share Cheese And Herb Rolls

One of the most delightful things about Mary Berry’s classic Tear and Share Cheese and Herb Rolls is how easily customizable they are. The base recipe is beautifully simple-soft, enriched dough swirled with gooey cheese and aromatic herbs-but this simplicity is exactly what makes it ripe for variation. Let’s explore several delicious twists you can try:
1. Cheese Varieties Galore
Mary’s recipe typically uses a sharp, mature cheddar, which gives a lovely bite and melts beautifully. But don’t stop there-cheese opens up a whole world of flavors:
- Gruyère or Emmental: For a nuttier, slightly sweet flavour. Great for a more European twist.
- Mozzarella and Parmesan combo: Mozzarella gives you that melt-in-the-mouth texture, while Parmesan adds saltiness and depth.
- Blue cheese lovers: Crumble in a bit of Stilton or Gorgonzola for a punchy, savoury variation.
- Smoked cheese: For a rustic, warming flavour that pairs beautifully with thyme or rosemary.
2. Herb Infusions
The original recipe often features parsley, thyme, or chives-simple yet fragrant. Want to switch things up?
- Mediterranean vibes: Use oregano, basil, and a pinch of dried rosemary with feta cheese.
- Fresh garden taste: Try tarragon and dill with a creamy cheese like Boursin or goat cheese.
- Heat and herby fusion: Add finely chopped coriander, a sprinkle of cumin seeds, and a touch of chili flakes.
3. Fillings Beyond Cheese
You can elevate these rolls into something heartier or even turn them into a meal-in-themselves with extra fillings:
- Caramelized onions and garlic: Fold through the dough before rolling.
- Sun-dried tomatoes and olives: Give a Mediterranean punch-add these sparingly to avoid too much moisture.
- Ham or prosciutto: A classic deli-style addition that pairs wonderfully with cheddar or Gruyère.
- Cooked bacon bits and jalapeños: Perfect for a smoky, spicy twist.
4. Dough Enhancements
While the standard enriched dough is already lovely and soft, you can tweak it for different textures and flavors:
- Add whole grain flour (swap out about ⅓ of the white flour): gives a nuttier, slightly denser finish.
- Mix in seeds like poppy, sesame, or flax for extra crunch and nutrition.
- A touch of honey or malt extract in the dough adds a slightly sweet, almost brioche-like depth.
These variations can be mixed and matched based on what you have in your pantry or the flavour profile you’re craving. The rolls are forgiving and versatile, making them a baker’s playground.
Storing Leftovers
Let’s be honest-these rolls are so moreish, leftovers might be a rare luxury. But should you have any left (maybe because you doubled the batch like a genius), here’s how to keep them tasting fresh and fabulous.
1. Room Temperature (Short-Term)
If you plan to eat the leftovers within a day or two:
- Let the rolls cool completely.
- Store them in an airtight container or tightly wrap them in foil.
- Keep them at room temperature, away from direct sunlight or heat.
This method keeps the crust from going too soft and maintains the interior fluffiness.
2. Refrigeration (Up To 3-4 Days)
Because of the cheese content, refrigeration is a good idea for slightly longer storage.
- Wrap the rolls tightly in foil or plastic wrap to prevent them from drying out.
- You can reheat individual rolls in the microwave for about 20-30 seconds, or pop them in a warm oven (160°C/320°F) for 5-10 minutes to crisp them back up.
3. Freezing (For Long-Term Storage)
These rolls actually freeze surprisingly well!
- Wrap each roll individually in cling film, then place them all in a large freezer bag or airtight container.
- Freeze for up to 3 months.
- To reheat, let them thaw at room temperature for a couple of hours, then warm them in the oven for 10-12 minutes. You can also reheat from frozen-just add a bit more oven time.
Pro Tip: Spritz The Rolls Lightly With Water Before Reheating In The Oven. This Helps Rehydrate The Crust And Keeps Them Soft Inside.
What To Eat With Mary Berry’s Tear And Share Cheese And Herb Rolls?
These rolls are stars in their own right, but they also play beautifully with other dishes. Whether you’re planning a cozy meal or building a bigger menu, here are some pairing ideas:
1. Soups And Stews
A natural partner. These cheesy, herby rolls are perfect for dunking.
- Tomato basil soup: Classic and comforting-the acidity of the tomatoes balances the richness of the rolls.
- Creamy mushroom soup: Earthy and luxurious.
- Hearty beef stew: The robust flavours of a slow-cooked stew complement the softness and savouriness of the rolls.
2. Salads
Lighter dishes provide a refreshing contrast to the dense, rich bread.
- Rocket and pear salad: Peppery rocket, sweet pear, and toasted walnuts are a lovely foil for the cheese.
- Caesar salad: The garlicky dressing and crisp lettuce balance the soft, cheesy bread.
- Mediterranean quinoa salad: With cucumber, tomato, olives, and lemon dressing-especially nice if you’ve done a Greek-style roll variation.
3. Main Courses
Use the rolls as a side for:
- Grilled or roasted chicken: Herby chicken pairs wonderfully with the herbaceous bread.
- Pasta dishes: Especially creamy ones-Alfredo, carbonara, or a veggie lasagna.
- Baked salmon: Add a touch of citrus and a side of green beans for a classy plate.
4. Snack Platters And Brunch Boards
Slice up the rolls or let people tear them naturally and serve with:
- Cured meats, olives, and cheeses
- Hummus or baba ganoush
- Herbed butter or garlic aioli for dipping
Conclusion
Mary Berry’s Tear and Share Cheese and Herb Rolls are more than just a bake-they’re a gateway to a versatile, comforting, and communal eating experience. Whether you’re sticking closely to the original or experimenting with bold new flavours, this recipe adapts effortlessly. It’s the kind of dish that encourages hands-on eating, warm conversations, and second helpings.
They’re easy enough for a weeknight treat, impressive enough for guests, and forgiving enough for baking beginners. With thoughtful storage and creative pairings, these rolls can stretch beyond the baking tray to become the cornerstone of an entire meal or a standout snack.
So next time you’re wondering what to bake that feels both familiar and special-let these cheesy, herby, pull-apart wonders be your answer. Happy baking!
FAQs
What Are The Key Ingredients Needed For Mary Berry’s Tear And Share Cheese And Herb Rolls?
The key ingredients for Mary Berry’s Tear and Share Cheese and Herb Rolls include self-raising flour, cheddar cheese, butter, milk, a selection of fresh herbs (such as parsley and chives), and salt. You may also need some extra cheese for topping and a little flour for dusting the work surface. This recipe is simple but delivers a soft, cheesy flavor with a herby aroma, perfect for sharing at a gathering.
How Do I Prepare Mary Berry’s Tear And Share Cheese And Herb Rolls?
To prepare the rolls, you start by combining the self-raising flour, cheese, and chopped herbs in a bowl. After rubbing in the butter until the mixture resembles breadcrumbs, you gradually add milk to form a dough. Turn the dough out onto a floured surface, knead lightly, and roll it into a rectangle. Then, cut it into squares, stack them in a baking dish, and bake until golden brown. This recipe is quick, taking around 30-40 minutes in total.
Can I Make Mary Berry’s Tear And Share Cheese And Herb Rolls In Advance?
Yes, you can make these rolls in advance! You can prepare the dough the night before and store it in the fridge, covered with a damp tea towel or plastic wrap. When you’re ready to bake, simply bring the dough to room temperature and continue with the recipe. Alternatively, you can freeze the unbaked rolls and bake them from frozen-just add a few extra minutes to the cooking time. These rolls are best enjoyed fresh out of the oven for the best texture and flavor.