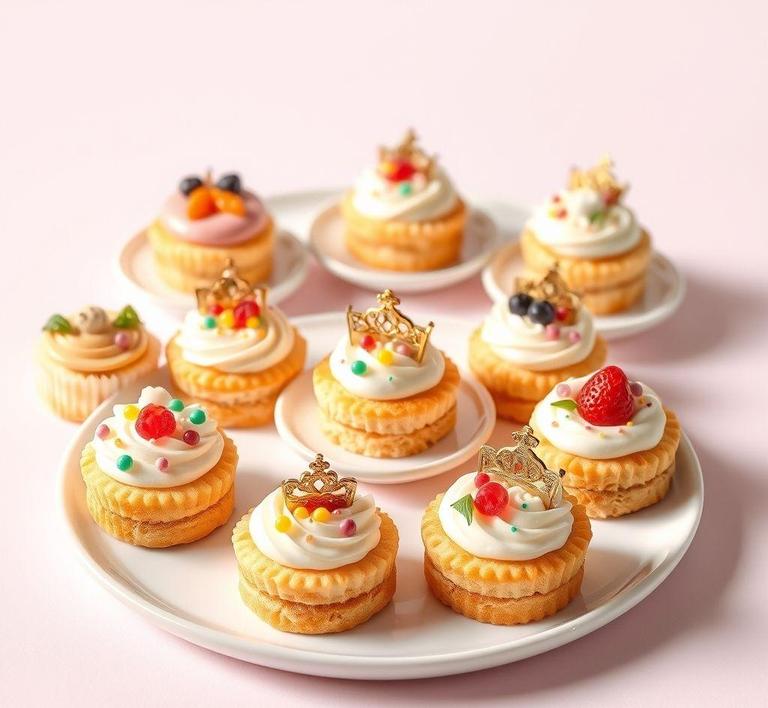
Mary Berry’s Queen Cakes are a classic British treat, often enjoyed as a light, fluffy alternative to heavier fruit cakes or pastries. These little individual sponge cakes are traditionally baked in cupcake-sized portions, making them a perfect tea-time snack or lunchbox treat. The recipe is simple, but it produces delicious, airy cakes with a slight golden color and a subtle sweetness that makes them incredibly moreish.
Originating in the UK, these cakes are often associated with traditional British baking, a style characterized by its simplicity, emphasis on flavor, and use of easily accessible ingredients. Mary Berry, the renowned British baker, has popularized this recipe, bringing it into homes across the nation and beyond. Her Queen Cakes are often considered a great way to introduce novice bakers to the art of making sponge cakes, as they don’t require elaborate techniques or special ingredients.
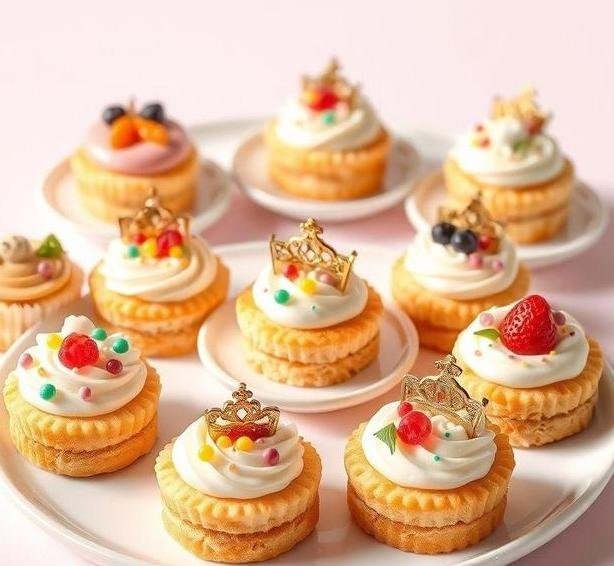
What makes these cakes stand out, however, is their light texture and perfectly balanced sweetness. The inclusion of butter and self-raising flour gives them a delicate crumb, while a dash of vanilla adds a fragrant depth to the flavor. Typically, these cakes are baked plain, but they can be decorated with a simple dusting of icing sugar, or even topped with a maraschino cherry for an extra pop of color and flavor. The result is a treat that’s simultaneously charming and comforting, a true reflection of Mary Berry’s style-approachable, elegant, and timeless.
Mary Berry’s Queen Cakes Recipe
Ingredients Needed
Mary Berry’s Queen Cakes recipe uses a handful of pantry staples, ensuring that these cakes are both easy to prepare and delicious. Here’s what you’ll need:
-
Butter (room temperature) – 100g
Unsalted butter is ideal, as it gives the cakes a soft texture and a rich flavor. Room temperature butter ensures the ingredients mix evenly.
-
Caster Sugar – 100g
Caster sugar dissolves more easily than regular granulated sugar, helping create a smoother batter and a light crumb texture.
-
Self-Raising Flour – 100g
This type of flour is key to getting the perfect rise. It already contains baking powder, which helps the cakes to rise without needing additional leavening agents.
-
Eggs – 2 large
Eggs bind the ingredients together and help create the fluffy structure. They should also be at room temperature for the best results.
-
Vanilla Extract – 1 tsp
Vanilla adds a lovely depth of flavor that complements the other ingredients, though you could also use almond extract for a slightly different taste.
-
Milk – 2 tbsp
The milk adds moisture to the batter, ensuring the cakes stay soft and tender as they bake.
-
Maraschino Cherries or Icing Sugar (optional)
For decoration, you can add a maraschino cherry on top of each cake before baking, or sprinkle the cooled cakes with icing sugar for a light finish.
Equipment Needed
To make Mary Berry’s Queen Cakes, you’ll need the following equipment:
-
Baking Tray or Muffin Tin
A 12-hole muffin tin works perfectly for this recipe, ensuring the cakes bake evenly in individual portions.
-
Paper Cupcake Cases
These are essential to keep the cakes from sticking to the tin and to make serving them easier. The cases also help the cakes maintain their shape as they rise.
-
Electric Mixer or Whisk
An electric hand mixer or a stand mixer makes light work of creaming the butter and sugar together, ensuring a smooth batter. However, a whisk and a little elbow grease can do the job if you prefer to go manual.
-
Spatula or Wooden Spoon
A spatula is helpful for scraping down the sides of the bowl and folding in ingredients once the wet and dry ingredients are combined.
-
Cooling Rack
Once baked, the cakes need to cool properly to prevent them from becoming soggy. A cooling rack allows air to circulate around the cakes and cool them evenly.
-
Measuring Spoons and Scales
Precision in baking is essential, so having accurate measuring tools is a must to ensure the correct balance of ingredients.
Instructions To Make Mary Berry’s Queen Cakes
Now that you have all the ingredients and equipment ready, it’s time to get baking! Follow these simple steps to create your batch of Mary Berry’s delightful Queen Cakes:
-
Preheat the Oven
Begin by preheating your oven to 190°C (170°C fan-assisted) or 375°F. Line your 12-hole muffin tin with paper cupcake cases.
-
Cream the Butter and Sugar
In a large bowl, use an electric mixer or a whisk to cream the butter and caster sugar together until the mixture is pale and fluffy. This usually takes about 3-5 minutes, depending on your mixer.
-
Add the Eggs and Vanilla
Beat the eggs lightly and gradually add them to the butter-sugar mixture, one at a time, mixing well after each addition. Add the vanilla extract at this stage and combine thoroughly.
-
Fold in the Flour
Sift the self-raising flour into the bowl to avoid lumps. Gently fold the flour into the wet ingredients using a spatula or wooden spoon. Be careful not to overmix, as this can make the cakes dense.
-
Add the Milk
Pour in the milk and gently fold it into the batter to loosen it slightly. The consistency should be smooth but not runny.
-
Spoon the Batter into the Cases
Using a spoon, divide the batter evenly among the cupcake cases, filling each about two-thirds full.
-
Bake the Cakes
Place the tin in the preheated oven and bake for around 15-20 minutes, or until the cakes are golden and a skewer inserted into the center comes out clean. Keep an eye on them as baking times can vary slightly depending on your oven.
-
Cool the Cakes
Once baked, remove the tin from the oven and let the cakes cool in the tin for a few minutes. Then, transfer them to a cooling rack to cool completely.
-
Decorate (Optional)
Once the cakes have cooled, you can decorate them with a light dusting of icing sugar, or top each with a maraschino cherry for a more traditional look.
Tips And Tricks
- Room Temperature Ingredients: Be sure your butter and eggs are at room temperature before starting. This will help the ingredients blend together smoothly and create a lighter texture.
- Don’t Overmix the Batter: Once you add the flour, mix just until combined. Overmixing will lead to dense cakes.
- Check the Cakes Early: Ovens vary, so it’s a good idea to check the cakes around the 12-minute mark. They should spring back when lightly pressed and turn golden brown.
- Flavor Variations: Feel free to customize your Queen Cakes by adding a handful of dried fruit, such as sultanas or currants, or even a little zest of lemon for a fresh, tangy twist.
- Make Them Mini: If you prefer smaller cakes, use a mini muffin tin to create bite-sized versions. Just keep an eye on the baking time, as these will cook faster.
- Storage: These cakes can be stored in an airtight container for up to 3 days, though they’re best eaten fresh. They can also be frozen for up to a month, just make sure they’re fully cooled before freezing.
Mary Berry’s Queen Cakes are a wonderful introduction to British baking. Their light, fluffy texture and simple, wholesome ingredients make them an enduring favorite for both seasoned bakers and beginners. Whether you’re enjoying them with a cup of tea, taking them to a picnic, or packing them in lunchboxes, they always hit the mark with their delicate sweetness and satisfying texture.
By following these simple steps and tips, you can recreate these charming cakes at home and delight your friends and family with your baking skills. The beauty of Mary Berry’s Queen Cakes lies in their versatility-while the basic recipe is a great starting point, you can easily customize it to suit your taste. From adding fruit to experimenting with flavors, these cakes are a blank canvas for your creativity in the kitchen.
Easy Recipe Variations For Mary Berry’s Queen Cakes
Mary Berry’s Queen Cakes are the perfect balance of light, fluffy sponge and rich flavor. But as with any classic recipe, there’s always room to get creative! There are several easy variations you can try to put your personal spin on these traditional treats while keeping their signature taste and texture intact.
-
Fruit Queen Cakes
Adding fresh or dried fruit to the batter is a fantastic way to introduce extra flavor and moisture. Consider mixing in chopped strawberries, raspberries, or blueberries for a summery twist. Dried fruits like sultanas, currants, or mixed dried fruits can also be folded into the batter for a deeper, slightly chewy texture. A teaspoon of lemon zest can brighten up the fruit flavors, or for something more indulgent, try adding a swirl of raspberry or strawberry jam in the center before baking.
-
Nutty Queen Cakes
If you’re a fan of a nutty crunch, incorporating nuts can elevate your Queen Cakes in the most delicious way. Chopped almonds, walnuts, or hazelnuts can be mixed into the batter, giving the cakes a lovely texture and flavor. For a more decadent touch, scatter some chopped nuts on top before baking or dust the cakes with powdered sugar after baking to create a nutty, sweet finishing layer.
-
Chocolate Queen Cakes
Chocolate lovers, rejoice! Adding cocoa powder to the batter is an easy way to transform the Queen Cakes into a chocolate version. For an extra chocolatey twist, you can fold in small pieces of chocolate or chocolate chips to give a gooey, melty surprise inside. A drizzle of melted chocolate on top can add a rich, glossy finish, turning the simple Queen Cake into an irresistible dessert.
-
Spiced Queen Cakes
Spice things up by incorporating ground cinnamon, nutmeg, or allspice into the batter. These warm spices are especially perfect for autumn or winter months, adding comforting notes to your cakes. For an even bolder flavor, try adding a bit of ground ginger or cardamom for a fragrant kick. You can also experiment with a little vanilla extract or orange zest to complement the spices.
-
Lemon and Poppy Seed Queen Cakes
A refreshing twist on the classic, lemon and poppy seed Queen Cakes add a zesty and aromatic flavor. Simply fold in the zest of one lemon along with a tablespoon or two of poppy seeds for a light crunch. The lemon pairs beautifully with the softness of the cake, while the poppy seeds give it a delightful texture. You could also glaze the cakes with a sweet lemon glaze for an extra burst of citrusy sweetness.
-
Vegan Queen Cakes
For those following a plant-based lifestyle, you can easily make Mary Berry’s Queen Cakes vegan. Swap the butter for dairy-free margarine or vegetable oil, and replace the eggs with flaxseed meal or chia seeds mixed with water (to create an egg substitute). Non-dairy milk like almond, soy, or oat milk works well in the recipe. Just be sure to double-check that all your ingredients, like the baking powder, are free of animal products.
-
Mini Queen Cakes with Icing
If you want to create an elegant twist, bake mini versions of the Queen Cakes in a cupcake tray. Once cooled, you can pipe a delicate swirl of buttercream icing or cream cheese frosting on top, decorating with edible flowers, sprinkles, or a light dusting of icing sugar. This variation is perfect for parties, afternoon teas, or gifting to loved ones.
Storing Leftovers
Mary Berry’s Queen Cakes are best enjoyed fresh, but they can be stored for a few days if you have leftovers. Here are some tips to keep your cakes fresh and tasty:
-
Room Temperature Storage
If you plan on eating your Queen Cakes within a day or two, storing them in an airtight container at room temperature works perfectly. The cakes will remain soft and fluffy for up to 2-3 days, provided they’re kept sealed tightly to prevent air from drying them out.
-
Freezing Queen Cakes
For longer storage, freezing is a great option. Allow your Queen Cakes to cool completely before wrapping them individually in cling film or foil. Then, place the wrapped cakes in a freezer-safe container or freezer bag. This method can preserve the cakes for up to 3 months. When ready to eat, simply thaw them at room temperature for a few hours or pop them in the microwave for a few seconds to restore their softness.
-
Refrigeration
While refrigeration isn’t always necessary, if your Queen Cakes have a frosting or topping like cream cheese or buttercream, it’s best to store them in the fridge. This will prevent the frosting from melting or spoiling. Just make sure to bring them back to room temperature before serving for the best flavor and texture.
-
Reviving Leftovers
If your Queen Cakes have become a little stale, don’t fret. A quick pop in the microwave for 10-15 seconds will bring back their fluffiness. Alternatively, you can heat them in the oven at 150°C (300°F) for about 5 minutes to freshen them up.
What To Eat With Mary Berry’s Queen Cakes?
Mary Berry’s Queen Cakes are delicious on their own, but they also pair wonderfully with a variety of accompaniments. Whether you’re serving them for tea, dessert, or as a sweet snack, here are some perfect pairings:
-
Tea
The classic pairing with Queen Cakes has to be a good cup of tea. Black teas like Earl Grey or English Breakfast are a natural match, with their strong, slightly bitter flavors balancing out the sweetness of the cakes. For a lighter option, try a delicate green tea or a floral chamomile tea. If you prefer something more indulgent, a creamy cup of hot chocolate complements the spongy texture of the cakes beautifully.
-
Clotted Cream and Jam
If you want to turn your Queen Cakes into something even more indulgent, serve them with clotted cream and jam. The richness of the clotted cream paired with the sweetness of strawberry, raspberry, or apricot jam is a luxurious combination that enhances the flavor of the cakes. It’s a traditional pairing that’s perfect for an afternoon tea.
-
Fresh Berries and Whipped Cream
Fresh berries like strawberries, raspberries, or blueberries add a burst of freshness that pairs wonderfully with the soft sponge of Queen Cakes. Top them with a dollop of lightly sweetened whipped cream for a simple yet sophisticated treat. The contrast of sweet, tangy fruit and creamy, fluffy topping elevates the cakes to a new level.
-
Ice Cream
For a more decadent dessert, serve your Queen Cakes with a scoop of ice cream. Vanilla, raspberry ripple, or even a tangy lemon sorbet would work wonderfully with the light, airy sponge. You can also drizzle warm chocolate or caramel sauce over the top for an indulgent touch.
-
Custard
If you’re looking for a comforting and classic pairing, custard works like a charm with Queen Cakes. Whether it’s hot or cold, the smooth, creamy texture of custard adds a delicious contrast to the fluffy cakes. Try pouring a little custard over the cakes or serving it on the side for dipping.
Conclusion
Mary Berry’s Queen Cakes are a delightful treat that can easily be personalized to suit any occasion or preference. From fruity variations to decadent chocolate versions, the possibilities are endless. They’re perfect for a traditional afternoon tea, a special occasion, or just a simple snack to enjoy with a cup of tea.
Their versatility extends beyond the baking process-storing leftovers is simple, and they freeze beautifully, so you can savor them long after they’ve been baked. Whether you’re enjoying them alone or with a side of jam, whipped cream, or fresh berries, Mary Berry’s Queen Cakes are a versatile, timeless treat that will never go out of style.
So go ahead, experiment with different flavors, store your leftovers with care, and serve these delightful cakes with your favorite accompaniments. Whatever you choose, these cakes are sure to bring joy to any gathering.
FAQs
What Ingredients Do I Need To Make Mary Berry’s Queen Cakes?
To make Mary Berry’s Queen Cakes, you’ll need the following ingredients: 100g self-raising flour, 100g caster sugar, 100g butter (softened), 2 large eggs, 1 tsp vanilla extract, 1 tbsp milk, and some raspberry jam or strawberry jam for filling. For decoration, you’ll need icing sugar, and optionally, a few glace cherries to top each cake. It’s a simple, straightforward recipe with ingredients you may already have in your kitchen.
How Long Do I Need To Bake Mary Berry’s Queen Cakes?
Mary Berry’s Queen Cakes typically require 15-20 minutes in a preheated oven at 180°C (160°C for fan ovens) or 350°F. The cakes should be golden brown and spring back when lightly pressed in the center. Make sure to check with a skewer-if it comes out clean, the cakes are done. If not, give them an extra few minutes but be cautious not to over-bake.
Can I Make Mary Berry’s Queen Cakes In Advance And How Do I Store Them?
Yes, you can make Mary Berry’s Queen Cakes in advance. Once baked and cooled, store them in an airtight container for up to 3-4 days. If you plan to freeze them, you can freeze the cakes without the jam and icing, which helps preserve the freshness. Just wrap them tightly in plastic wrap or foil before freezing. When ready to serve, simply thaw and add the jam and icing sugar for a fresh taste.