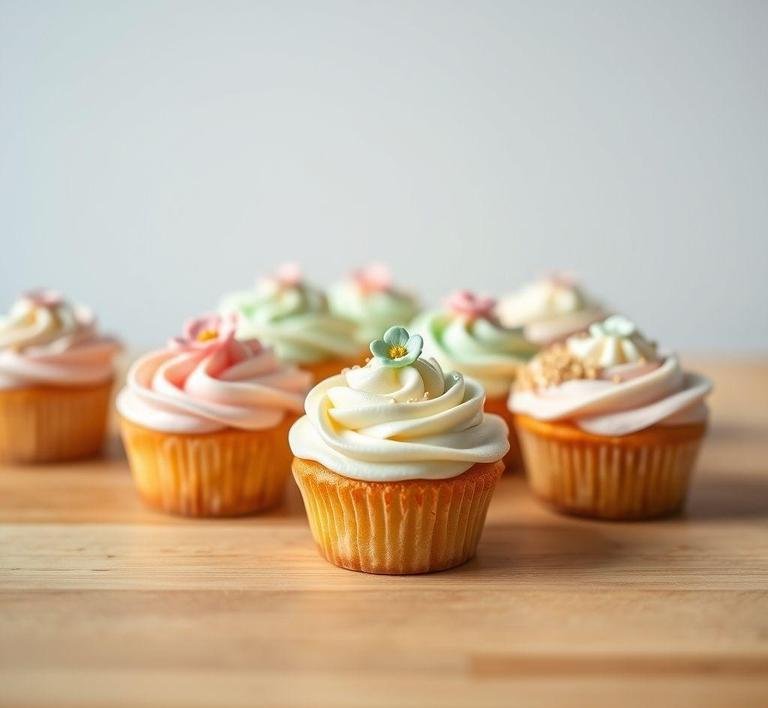
Mary Berry’s Iced Fairy Cakes are a delightful British treat, often enjoyed as a light, airy dessert or afternoon snack. These petite, cupcake-sized confections are known for their delicate sponge texture and sweet, glossy icing topping. Mary Berry, a renowned British baker and television personality, is famous for simplifying complex baking methods, making them accessible to everyone. Her version of iced fairy cakes is no exception – they’re approachable yet impressive, perfect for a tea party, children’s birthday celebrations, or any occasion where a touch of sweetness is required.
Fairy cakes themselves are a classic British baking item, believed to date back to the 19th century. The name "fairy" evokes images of something dainty and delicate, fitting for the light, fluffy texture of these miniature cakes. Unlike a traditional cupcake, fairy cakes are usually smaller and lighter, with a more crumbly, sponge-like consistency. They are topped with a simple, sweet icing that often glistens in the light, making them a visually appealing treat that delights both the eyes and the taste buds.
What sets Mary Berry’s iced fairy cakes apart from other recipes is the careful balance of ingredients that results in a tender crumb, along with the addition of a perfect, easy-to-make icing. Her recipe has stood the test of time, and it remains a staple in the British baking community.
Mary Berry’s Iced Fairy Cakes Recipe
Ingredients Needed
Making Mary Berry’s Iced Fairy Cakes is quite simple, and the ingredients are easy to find in most supermarkets or local stores. Here’s what you’ll need:
For The Fairy Cakes
- 125g unsalted butter (at room temperature): This creates a soft, moist crumb while adding richness.
- 125g caster sugar: A fine sugar that dissolves quickly, helping the batter remain light and fluffy.
- 2 large eggs: Eggs bind the ingredients together, while contributing to the rise of the cakes.
- 125g self-raising flour: This is the key to making the cakes light and airy. Self-raising flour already contains a leavening agent, so no additional raising agents are required.
- 1 teaspoon vanilla extract: The vanilla adds warmth and depth of flavor to the sponge.
- A pinch of salt: This helps to balance the sweetness and enhance the flavors.
For The Icing
- 200g icing sugar: This gives the icing its sweet, smooth texture.
- 1-2 tablespoons water or lemon juice: These liquids help to form the glossy, pourable consistency for the icing. Lemon juice adds a subtle tang, balancing the sweetness of the sugar.
While this list may seem minimal, the magic lies in the technique and the balance of flavors and textures that Mary Berry achieves in these little cakes.
Equipment Needed
The equipment required for this recipe is fairly standard and easy to assemble. You don’t need any special tools – just a few basics to get the job done.
- Mixing bowl: For combining the cake ingredients.
- Electric hand mixer or stand mixer: While you can mix by hand, an electric mixer is preferred for achieving the light and airy batter that makes these cakes so special.
- Spoon or spatula: To scrape down the sides of the bowl and ensure all ingredients are incorporated.
- Fairy cake or cupcake tray: A tray with 12 cupcake-sized compartments works best. If you don’t have one specifically for fairy cakes, a regular muffin tin will suffice.
- Paper cake cases: These are necessary for lining the cake tin. Choose small, colorful cases for a fun look or simple white ones for a more classic appearance.
- Sifter or fine mesh sieve: To sift the self-raising flour and icing sugar, ensuring a smooth texture without any lumps.
- Small spoon or piping bag (optional): To apply the icing to the cakes.
Instructions To Make Mary Berry’s Iced Fairy Cakes
Making Mary Berry’s iced fairy cakes is a straightforward process that requires a little patience and attention to detail. Here’s a step-by-step guide to ensure you create the perfect batch of fairy cakes:
-
Preheat the oven and prepare the baking tin:
Preheat your oven to 180°C (160°C fan) or 350°F. Line a 12-hole fairy cake or cupcake tray with paper cake cases.
-
Cream the butter and sugar:
In a large mixing bowl, beat the softened butter and caster sugar together using an electric hand mixer or stand mixer. Continue until the mixture is light, fluffy, and pale in color (usually around 4-5 minutes).
-
Add the eggs:
Crack the eggs into a separate bowl and beat them lightly with a fork. Gradually add the beaten eggs into the butter and sugar mixture, one at a time, mixing well after each addition. If the mixture begins to curdle, add a spoonful of flour to bring it back together.
-
Incorporate the flour and vanilla:
Sift the self-raising flour into the bowl along with the pinch of salt. Add the vanilla extract. Gently fold the flour into the mixture using a spatula or spoon until just combined. Be careful not to over-mix; you want to keep the batter light and airy.
-
Spoon the mixture into the cases:
Spoon the batter evenly into the prepared paper cases, filling each about two-thirds full. Smooth the tops slightly for an even bake.
-
Bake the cakes:
Place the tray in the preheated oven and bake for 12-15 minutes, or until the cakes are golden brown and spring back when lightly pressed. A skewer inserted into the center of a cake should come out clean. Allow the cakes to cool in the tray for 5 minutes before transferring them to a wire rack to cool completely.
-
Prepare the icing:
While the cakes are cooling, make the icing. Sift the icing sugar into a bowl and gradually add the water or lemon juice, a little at a time, until you have a smooth, thick but pourable icing.
-
Ice the cakes:
Once the cakes are completely cooled, spoon a small amount of icing onto each cake and gently spread it over the top using the back of the spoon. You can also dip the tops of the cakes directly into the icing for a smoother finish.
-
Optional decoration:
If you like, you can decorate the icing with sprinkles, edible glitter, or small sugar flowers for a fun touch.
-
Serve and enjoy:
Your Mary Berry iced fairy cakes are now ready to be enjoyed! They’re perfect with a cup of tea or coffee, or as a sweet treat at a celebration.
Tips And Tricks
- Room temperature ingredients: Always ensure that your butter and eggs are at room temperature before beginning. Cold ingredients can lead to a denser batter and less fluffy cakes.
- Don’t over-mix: When adding the flour, mix it just until combined. Overworking the batter can result in tough cakes.
- Check the oven temperature: Every oven is different, so keep an eye on your cakes as they bake. If they’re browning too quickly, reduce the oven temperature slightly.
- Sifting the flour: Sifting flour ensures that there are no lumps and helps to lighten the texture of the sponge.
- Perfect icing: For the glossy icing, make sure the cakes are fully cooled before applying the icing. Warm cakes can cause the icing to melt and run off.
- Make ahead: The fairy cakes can be made a day in advance and stored in an airtight container. Just wait to ice them until the day you plan to serve them, as the icing can soften and lose its shine over time.
Mary Berry’s Iced Fairy Cakes are a timeless, delicious treat that’s as charming as it is easy to make. With their delicate sponge and smooth, sweet icing, these little cakes are a perfect way to add a touch of elegance to any occasion. Whether you’re hosting a tea party, celebrating a birthday, or simply indulging in a sweet snack, they’re sure to impress. The simple ingredients and straightforward instructions make them accessible to both beginner and experienced bakers alike, while Mary Berry’s tips and tricks ensure your cakes come out light, fluffy, and perfectly iced every time.
Easy Recipe Variations For Mary Berry’s Iced Fairy Cakes

Mary Berry’s iced fairy cakes are the epitome of light, airy, and delicate treats. The traditional recipe calls for a soft, fluffy sponge topped with a sweet, glossy icing. But, like most beloved recipes, there are numerous ways to get creative while still keeping the heart of the cake intact. Whether you’re looking to add a twist or cater to dietary preferences, there are endless variations to explore. Let’s dive into some easy alternatives that will make your fairy cakes stand out!
1. Fruit-Infused Sponge
You can add a burst of fruity flavor to the sponge itself by incorporating lemon zest, orange zest, or even a dash of vanilla extract into the batter. For an even fruitier version, consider folding in some finely chopped fresh berries like raspberries or strawberries. These additions will infuse the cakes with a fragrant citrusy aroma or sweet berry notes, elevating the overall flavor without overpowering the delicate crumb.
2. Flavored Icing
While the classic Mary Berry recipe often calls for a simple icing sugar glaze, experimenting with flavored icings is a great way to add a personal touch. You could create a lemon icing by mixing lemon juice and zest into the icing sugar, offering a tangy contrast to the sweetness of the sponge. Alternatively, a raspberry glaze could be made by mashing raspberries and straining the juice, which adds a beautiful color and a slightly tart flavor that pairs perfectly with the sweetness of the cakes.
3. Chocolate Version
For those who can’t resist a bit of chocolate, consider adding a few tablespoons of cocoa powder to the cake batter for a chocolate fairy cake. Pair it with a rich chocolate icing, perhaps adding a bit of melted dark chocolate to the glaze for an indulgent twist. You could even sprinkle some chocolate shavings or mini chocolate chips on top of the icing for added texture and visual appeal.
4. Vegetarian & Vegan-Friendly
For those following a plant-based or vegetarian diet, swapping out ingredients to make the fairy cakes suitable for vegans is simple. Use non-dairy milk (almond, oat, or soy) in place of regular milk, and replace eggs with flaxseed meal (1 tablespoon flaxseed meal mixed with 3 tablespoons water works well as an egg substitute). Vegan butter or margarine can be used for the cake base and icing, and you can easily swap in a plant-based icing sugar for the glaze.
5. Nuts And Seeds For Crunch
If you love a bit of texture, consider adding finely chopped nuts like almonds, walnuts, or hazelnuts to the batter. These will lend a gentle crunch without disturbing the lightness of the sponge. Alternatively, a sprinkle of toasted coconut flakes or chia seeds on top of the icing adds an interesting visual and textural contrast, making the cakes even more delightful.
6. Spiced Fairy Cakes
For a more autumnal or festive variation, spicing up the batter is an excellent option. Adding ground cinnamon, nutmeg, and a pinch of clove to the cake mixture will imbue your fairy cakes with a warm, cozy flavor. A spiced icing could follow suit, using a dash of ground cinnamon or ginger to create a sweet but aromatic topping.
Storing Leftovers
Mary Berry’s iced fairy cakes, while absolutely delicious fresh out of the oven, can still be enjoyed the next day (or two!) if properly stored. The light texture of these cakes can make them a bit delicate, so knowing how to store them correctly will help maintain their taste and texture.
1. At Room Temperature
To keep your fairy cakes fresh for about 2-3 days, store them in an airtight container at room temperature. A cake tin or a large, resealable plastic container works well. Make sure that the cakes are not overcrowded, as this can cause them to lose their airy quality and might result in the icing being squashed. If you have multiple layers of cakes, it’s a good idea to place a layer of parchment paper between them to prevent sticking.
2. Refrigeration
If you live in a warmer climate or need the cakes to last a little longer, you can store them in the fridge. Keep them in an airtight container and ensure the icing doesn’t melt or harden too much in the cold. The sponge itself might lose a bit of its fresh softness after being refrigerated, but the cakes should still taste wonderful. Remember, they can last for up to 5 days in the fridge, but for the best experience, they should be eaten within 2-3 days.
3. Freezing For Longer Storage
Freezing Mary Berry’s iced fairy cakes is a great option if you’re looking to preserve them for a few weeks. To freeze, place the cakes on a baking sheet lined with parchment paper and put them in the freezer for about an hour. Once frozen, transfer them to a freezer-safe bag or container. They will stay fresh in the freezer for up to a month. When you’re ready to enjoy them, let the cakes thaw at room temperature for a couple of hours. If desired, you can freshen up the icing by adding a little extra glaze once they’re thawed.
What To Eat With Mary Berry’s Iced Fairy Cakes?
Iced fairy cakes are a perfect stand-alone treat, but they can also pair beautifully with a variety of other foods and beverages to create a more substantial afternoon tea or dessert experience. Here are some delicious ideas for what to serve alongside these little delights:
1. Tea Or Coffee
An obvious but essential pairing-afternoon tea is synonymous with iced fairy cakes! Choose a light and fragrant tea like Earl Grey, Darjeeling, or green tea to complement the sweetness of the cakes. For coffee lovers, a well-brewed cappuccino or latte would be a great accompaniment, as the creaminess of the coffee pairs well with the lightness of the sponge.
2. Fresh Fruit
Serving a selection of fresh fruit on the side adds a refreshing contrast to the sweetness of the fairy cakes. Think strawberries, raspberries, or blueberries, which can even be lightly macerated with a little sugar to enhance their flavor. You could also serve citrus slices for a zesty counterpoint to the sugary icing.
3. Whipped Cream Or Clotted Cream
If you’re looking to add some richness, a dollop of whipped cream or clotted cream is the perfect side dish. The smooth, velvety cream balances the sweetness of the cakes and adds an indulgent touch. This is a particularly lovely pairing if you’re serving the cakes at a more formal gathering or for a special occasion.
4. Ice Cream
In warmer weather, vanilla ice cream or a fruity sorbet (like lemon or raspberry) would complement the fairy cakes perfectly. The cool, creamy texture of ice cream provides a delightful contrast to the soft, fluffy cake.
5. Light Sandwiches
To make the occasion feel a little more substantial, pair the cakes with a few light finger sandwiches-perhaps cucumber, smoked salmon, or egg and cress. These savory items balance out the sweetness of the fairy cakes and elevate the meal to a more complete tea experience.
Conclusion
Mary Berry’s iced fairy cakes are a timeless treat that can be enjoyed in countless ways. Whether you stick to the classic recipe or experiment with different flavor variations, these little cakes are versatile and endlessly adaptable. Their delicate sponge and sweet icing make them a perfect snack for all occasions-from casual family gatherings to more refined afternoon teas. With a few simple tips on storing and pairing, you can ensure your fairy cakes remain fresh and delightful long after baking.
FAQs
What Are The Key Ingredients In Mary Berry’s Iced Fairy Cakes Recipe?
The key ingredients for Mary Berry’s iced fairy cakes include self-raising flour, butter, caster sugar, eggs, vanilla extract, and milk. Additionally, you will need icing sugar and water for the icing. These simple ingredients combine to create light, fluffy cakes with a sweet, smooth icing on top.
Can I Make Mary Berry’s Iced Fairy Cakes In Advance?
Yes, you can make Mary Berry’s iced fairy cakes in advance. The cakes themselves can be baked a day or two before serving, and stored in an airtight container to keep them fresh. For best results, ice the cakes on the day you plan to serve them, as the icing may lose its texture and shine if stored for too long.
How Do I Ensure My Mary Berry Iced Fairy Cakes Rise Properly?
To ensure your Mary Berry iced fairy cakes rise properly, make sure you use room temperature ingredients, especially butter and eggs, as they help create a smooth batter. Be careful not to overmix the batter, as this can result in dense cakes. Additionally, filling the cupcake cases only about two-thirds full will give them enough room to rise evenly.