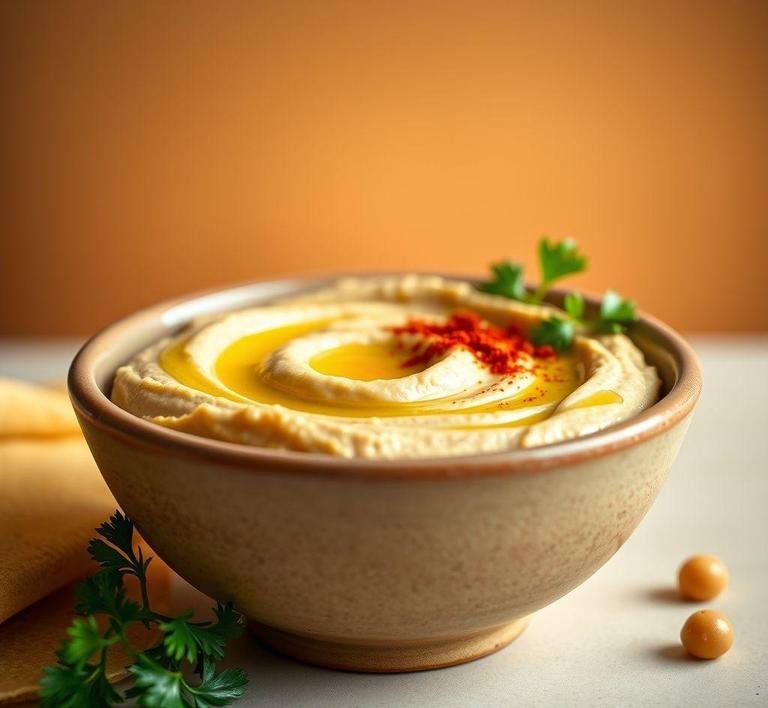
Mary Berry’s Hummus Dip is a velvety smooth, subtly spiced chickpea-based spread that is both comforting and versatile. True to her signature style, this version of hummus is refreshingly simple yet refined, allowing the core ingredients to shine without overwhelming the palate with too many bells and whistles.
Unlike some traditional hummus recipes that might lean heavily on garlic or tahini, Mary Berry opts for a more balanced flavor profile. Her hummus is light, creamy, and seasoned just right-perfect as a starter for a dinner party, a mid-afternoon snack, or a dip to accompany warm, fluffy flatbreads and crisp crudités. The result is a clean, nutty, and slightly tangy dip that feels indulgent but is incredibly healthy and easy to whip up at home.
Mary Berry’s Hummus Dip Recipe
Ingredients Needed
Mary Berry’s recipe typically keeps to the core Middle Eastern essentials, with just the right tweaks to suit a broader palate. Here’s what you’ll need:
- 1 can (400g) chickpeas, drained and rinsed (reserve some liquid)
- 1-2 tablespoons tahini (sesame seed paste)
- Juice of 1 lemon
- 1 small garlic clove, crushed (Mary keeps it subtle-no garlic overload!)
- 4 tablespoons olive oil (plus extra for drizzling)
- Salt and pepper, to taste
- 2-3 tablespoons chickpea liquid or cold water, to loosen the texture
- Pinch of ground cumin or paprika (optional, for extra flavor)
- Fresh parsley or paprika, for garnish (optional)
The charm here lies in how each ingredient plays its role-no overpowering flavors, just a harmonious blend.
Equipment Needed
The beauty of Mary Berry’s hummus is that you don’t need a high-end kitchen to recreate it. Here’s a list of the simple equipment you’ll want at the ready:
- Food processor or blender – This is the key to achieving that silky-smooth texture.
- Can opener – For the chickpeas, unless you’re using cooked dried ones.
- Citrus juicer – Optional, but helpful for extracting all the lemon juice.
- Garlic press or knife – To crush or finely mince the garlic.
- Measuring spoons – Precision makes a difference!
- Spatula – To scrape down the sides of the processor and transfer the dip.
Optional:
- Serving bowl – A shallow, wide-rimmed bowl is great for presentation.
- Spoon or small ladle – For creating that beautiful olive oil swirl on top.
Instructions To Make Mary Berry’s Hummus Dip
Now comes the fun part-bringing it all together! Here’s a step-by-step guide:
-
Prepare your chickpeas
Drain the can of chickpeas and rinse them thoroughly under cold water. If you like a super smooth hummus (and have a little extra time), you can peel the skins off the chickpeas. It’s a bit tedious, but the silky texture is worth it!
-
Blend the base
In a food processor, combine the chickpeas, tahini, lemon juice, garlic, and a good pinch of salt and pepper. Start blending on a low speed.
-
Add the oil and loosen
With the motor running, slowly drizzle in the olive oil. Pause and scrape down the sides of the bowl as needed. If the mixture is too thick or grainy, add a tablespoon or two of the reserved chickpea liquid or cold water. This helps achieve that dreamy, whipped consistency.
-
Taste and tweak
Once smooth, taste your hummus. Add more lemon juice, salt, or a bit more garlic depending on your preference. A touch of ground cumin can add a warm, earthy note if desired.
-
Serve beautifully
Spoon the hummus into a shallow serving dish. Use the back of a spoon to swirl it into soft peaks and valleys. Drizzle with a little extra olive oil and, if you like, sprinkle with paprika or chopped parsley for color and freshness.
Tips And Tricks
To elevate your hummus game from good to absolutely divine, here are a few expert tips Mary Berry (or any savvy cook) would approve of:
- Use quality olive oil – The flavor of the oil really comes through, so don’t skimp on a decent extra virgin olive oil.
- Adjust the tahini – Some people love it, some find it bitter. Start with 1 tablespoon and add more if needed.
- Temperature matters – Cold water or chickpea liquid helps emulsify and fluff the hummus, making it creamier.
- Peel the chickpeas for a silkier texture – Yes, it’s time-consuming, but if you want restaurant-quality hummus, this is your secret weapon.
- Make ahead – Hummus tastes even better after a few hours in the fridge, as the flavors have more time to meld.
- Storage – Store in an airtight container in the fridge for up to 5 days. Drizzle with a little oil to keep it fresh and moist.
Mary Berry’s Hummus Dip is more than just a snack-it’s a celebration of simple, honest ingredients transformed into something elegant and satisfying. Whether you’re scooping it up with warm pita bread, spooning it alongside grilled meats, or dolloping it onto a salad, this hummus adds a touch of creamy, garlicky goodness to everything it touches.
What makes this version special is its balance: not too garlicky, not overly tangy, and just the right consistency. It’s a dip that honors tradition while embracing a lighter, more approachable style that reflects Mary Berry’s culinary sensibility. So go ahead, whip up a batch, share it with friends-or just keep it all to yourself. We won’t tell.
Easy Recipe Variations For Mary Berry’s Hummus Dip
Mary Berry’s classic hummus recipe is known for its smooth, creamy texture and gentle, balanced flavor. Made from chickpeas, tahini, garlic, lemon juice, and olive oil, it’s the epitome of simplicity-but that’s also what makes it the perfect canvas for experimentation. You can transform her basic recipe into an array of exciting new dips with just a few additions or substitutions. Let’s explore some easy but impactful variations:
1. Roasted Red Pepper Hummus
Add roasted red peppers (either homemade or jarred) into the food processor with the rest of the ingredients. The peppers lend a smoky sweetness and a brilliant reddish-orange hue. For a bit of extra flair, sprinkle smoked paprika on top before serving.
2. Spicy Harissa Hummus
For those who love a bit of heat, mix in a spoonful of harissa paste-this North African chili blend adds depth, spice, and a little earthiness. It’s a particularly good choice if you’re serving hummus alongside grilled meats or vegetables.
3. Herby Green Hummus
Add a handful of fresh herbs like parsley, cilantro, basil, or mint to the mix. This gives the hummus a vibrant green color and a garden-fresh flavor. You can also add a small spoonful of Greek yogurt or avocado to make it even creamier.
4. Beetroot Hummus
For a naturally sweet and dramatically pink twist, blend in cooked beetroot. Not only is it visually striking, but it also adds a subtle earthiness that pairs wonderfully with tangy feta or salty crackers.
5. Smoky Paprika And Caramelized Onion Hummus
Slow-cooked onions blended into the hummus give it a slightly sweet, umami-packed richness. Finish with a dusting of smoked paprika and a swirl of olive oil for a warm, comforting flavor profile.
6. Lemon And Cumin Twist
If you’re a fan of zestier flavors, increase the lemon juice and add a teaspoon of ground cumin. It brightens the dip and gives it a gentle warmth. This version pairs beautifully with crispy pita chips and crunchy vegetables.
Each of these variations stays true to the creamy base Mary Berry is known for but adds a twist that can suit any palate or occasion-from cocktail parties to weeknight dinners.
Storing Leftovers
One of the great joys of hummus is that it keeps incredibly well, meaning you can make a generous batch and dip into it over the course of several days. But proper storage is key to maintaining its texture and freshness.
Refrigeration Tips
After making or opening your hummus, transfer it to an airtight container. Smooth the surface with a spoon and drizzle a little olive oil on top to help seal in moisture and prevent it from drying out. Store in the coldest part of your fridge, and it will stay fresh for up to 5-7 days.
If your hummus begins to dry out or separate slightly (which is normal), just give it a stir before serving. If needed, you can mix in a tiny splash of olive oil or lemon juice to refresh its creaminess.
Freezing Hummus
Yes, hummus can be frozen! It’s not as common, but it works if you’ve made a particularly large batch. Use a freezer-safe container and leave some room at the top, as it will expand. Freeze for up to 3 months. To thaw, place it in the refrigerator overnight and stir well before serving. Note that the texture might change slightly, becoming a bit grainy, but a quick blitz in the food processor can help smooth it out again.
What To Eat With Mary Berry’s Hummus Dip?
The beauty of hummus lies not just in its taste but in its incredible versatility. This creamy dip can shine in countless roles, from a humble snack to the star of an elegant spread. Here are some delicious ideas to inspire your next hummus pairing:
1. Classic Pairings
- Pita Bread or Pita Chips: Lightly toasted or baked, these are a traditional and satisfying vehicle for scooping hummus.
- Vegetable Crudités: Think crisp carrots, cucumber sticks, cherry tomatoes, bell pepper strips, and radishes. They add crunch and color.
- Crackers or Breadsticks: Especially seeded or wholegrain varieties, which contrast beautifully with hummus’s creaminess.
2. Mezze Style
Serve hummus alongside olives, dolmas (stuffed grape leaves), grilled halloumi, tabbouleh, and falafel for a Middle Eastern-inspired platter that’s perfect for grazing.
3. Sandwich And Wrap Spread
Use hummus as a spread in sandwiches or wraps in place of mayonnaise. It adds flavor and moisture, particularly when paired with grilled vegetables, feta cheese, or slices of roast chicken.
4. Topping For Baked Potatoes
Try slathering hummus onto a baked sweet potato or russet potato instead of butter or sour cream. Top with roasted veggies and a sprinkle of za’atar for a filling, plant-based meal.
5. Pasta Or Grain Bowl Booster
Mix a spoonful of hummus into warm pasta or grain bowls-it creates a creamy, flavorful sauce when thinned with a little warm water or lemon juice.
6. Breakfast Upgrade
Yes, hummus for breakfast is a thing! Try spreading it on toast and topping with sliced avocado, poached eggs, or even sautéed mushrooms.
Conclusion
Mary Berry’s hummus dip is more than just a snack-it’s a gateway to a world of flavorful exploration. With just a few ingredients, you can whip up something that feels both comforting and luxurious. And by embracing simple variations, you can tailor it to any mood or moment, whether it’s a quick bite on a busy day or part of an elegant evening spread.
Don’t forget, hummus is one of those magical recipes where storing leftovers isn’t just practical-it’s encouraged. The flavors continue to meld and deepen over time, often tasting even better the next day.
So go ahead, grab those chickpeas, fire up the food processor, and start experimenting. The beauty of Mary Berry’s hummus lies in its balance-but the joy comes from making it your own.
FAQs
What Ingredients Are Required For Mary Berry’s Hummus Dip Recipe?
To make Mary Berry’s hummus dip, you will need a can of chickpeas (drained and rinsed), tahini, garlic, lemon juice, olive oil, ground cumin, salt, and pepper. Optional ingredients include fresh parsley and paprika for garnishing. The simplicity of the ingredients helps create a creamy, flavorful hummus that’s perfect for dips or spreads.
How Long Does It Take To Prepare Mary Berry’s Hummus Dip?
Mary Berry’s hummus dip is very quick to prepare. It typically takes about 10 to 15 minutes to assemble all the ingredients and blend them together until smooth. The dip can be served immediately, but if you prefer, you can chill it in the refrigerator for an hour or so to allow the flavors to meld.
Can I Make Mary Berry’s Hummus Dip In Advance?
Yes, you can definitely make Mary Berry’s hummus dip ahead of time! It stores well in an airtight container in the fridge for up to 3-4 days. In fact, making it in advance can enhance the flavors as they have more time to develop. If it thickens too much in the fridge, simply add a little water or olive oil to achieve the desired consistency before serving.