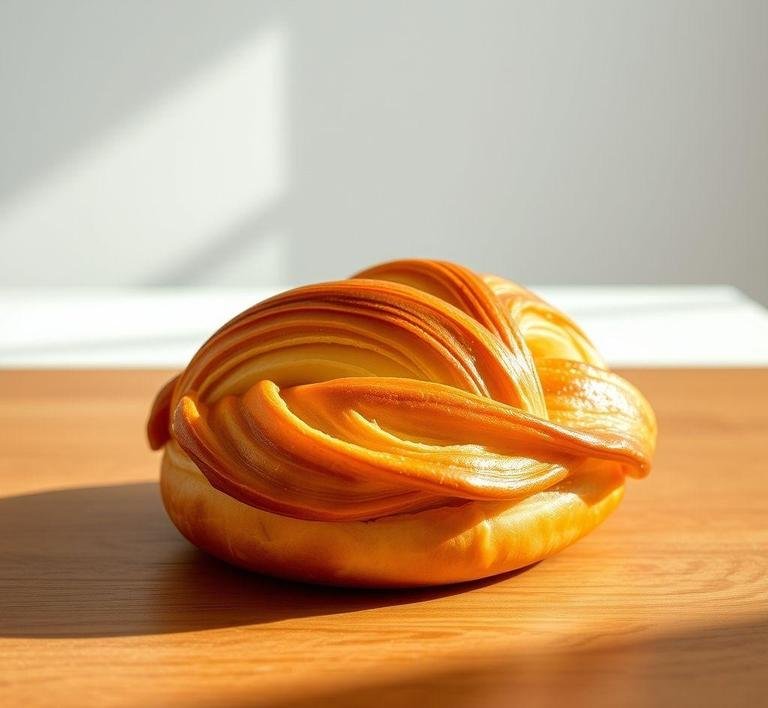
Mary Berry’s Danish Pastry is a delightful, buttery, and flaky pastry that has captured the hearts of bakers and food enthusiasts worldwide. Known for her impeccable skills in the kitchen and her mastery of traditional British baking, Mary Berry’s Danish pastry offers a unique twist on the classic Scandinavian treat. The pastry itself is a rich, multi-layered dough that combines the perfect balance of sweet and savory, with fillings that range from fruit preserves and custards to chocolate and almond paste.
The Danish pastry is traditionally made from laminated dough, similar to croissants, which involves folding butter into the dough multiple times to create those signature layers. Mary Berry, however, brings her own touch to this centuries-old recipe by emphasizing technique and the importance of using quality ingredients, allowing the pastry to rise to a wonderfully light, airy texture. The result is a golden-brown masterpiece that boasts both a crisp exterior and a soft, melt-in-your-mouth interior.
What sets Mary Berry’s Danish pastry apart is her ability to simplify complex baking techniques while ensuring that the final product retains all the flavor and charm of a traditional Danish pastry. Her method makes this beautiful pastry achievable for home bakers, turning even the most novice cook into a pastry master.
Mary Berry’s Danish Pastry Recipe
Ingredients Needed
Creating the perfect Danish pastry requires precision and a few essential ingredients. Here’s a rundown of the ingredients that will come together to form this delicious pastry:
- Strong white bread flour: This type of flour is essential for building structure in the dough. Its high protein content helps the pastry rise well, creating those iconic layers.
- Butter: A rich, high-quality butter is crucial. It not only imparts flavor but also creates the layers of flakiness. The butter should be cold when it is incorporated into the dough to ensure the layers form properly.
- Yeast: Both fresh or dried yeast can be used, but make sure it’s active. Yeast is responsible for the rise in the dough, giving it the soft texture inside the layers.
- Milk: Whole milk is best for a rich, creamy dough. The milk helps activate the yeast and contributes to the overall softness of the dough.
- Sugar: A small amount of sugar is added to provide a hint of sweetness and to feed the yeast, helping it to rise.
- Eggs: Eggs provide richness and color to the dough, ensuring a golden-brown finish once baked.
- Salt: Salt is vital for flavor balance and also helps to control the yeast activity.
- Vanilla extract: For any sweet fillings or glaze, vanilla adds a fragrant sweetness that complements the richness of the dough.
- Filling ingredients: Depending on the type of Danish pastry you’re making, fillings could include fruit preserves (like raspberry, apricot, or cherry), almond paste, cream cheese, custard, or chocolate chips.
These ingredients form the foundation of Mary Berry’s Danish pastry, allowing for both versatility and rich flavor in each bite. The fillings offer endless possibilities, from simple fruit and nut combinations to decadent chocolate creations.
Equipment Needed
To make Mary Berry’s Danish pastry, a few specialized tools can help ensure success in the kitchen. While the recipe itself isn’t overly complicated, using the right equipment can streamline the process and lead to better results. Here’s a list of what you’ll need:
- Mixing bowls: You’ll need a couple of large mixing bowls to combine the dough ingredients and to rise the dough during the proving stages.
- Rolling pin: A rolling pin is essential for flattening the dough to the correct thickness and for rolling out the laminated layers.
- Baking sheet: A sturdy baking sheet or tray will be needed to bake the pastries, ensuring that the heat is evenly distributed for a golden finish.
- Parchment paper: Lining your baking sheet with parchment paper helps prevent the pastry from sticking and ensures easy cleanup after baking.
- Pastry brush: A pastry brush is needed to apply egg wash (a mixture of beaten egg and water) to the pastry before baking, which gives it a golden, glossy finish.
- Measuring spoons and cups: Accurate measurements are essential when it comes to baking. Properly measuring out your ingredients ensures the dough has the correct consistency and structure.
- Stand mixer or hand mixer: While you can mix the dough by hand, a stand mixer with a dough hook attachment makes the process quicker and less labor-intensive.
- Cooling rack: Once your Danish pastries are out of the oven, a cooling rack allows them to cool evenly without becoming soggy.
Though not a vast array of equipment is required, each tool plays a significant role in achieving the delicate texture and flavor of Mary Berry’s Danish pastry.
Instructions To Make Mary Berry’s Danish Pastry
Making Mary Berry’s Danish pastry may seem daunting at first, but with patience and a few key techniques, you’ll create a bakery-worthy treat. Here’s a step-by-step guide to preparing this flaky, buttery pastry:
-
Prepare The Dough
- Begin by mixing the flour, sugar, salt, and yeast in a large bowl. Make a well in the center, add the milk, beaten eggs, and a little butter.
- Mix everything together to form a rough dough. If you’re using a stand mixer, knead it with the dough hook attachment on low speed for about 10 minutes, or until smooth and elastic.
- Cover the dough with a damp tea towel and let it rest in a warm place for about an hour, or until it has doubled in size.
-
Laminating The Dough
- Once the dough has risen, roll it out on a floured surface into a rectangle. Make sure it’s large enough to fold in the butter.
- Place cold butter between two sheets of parchment paper and pound it with a rolling pin to create a flat square or rectangle.
- Place the butter in the center of the dough, fold the dough over the butter, and roll it out again. Fold the dough into thirds like a letter, then roll it out again. Repeat this process a few times to build layers.
-
Shaping And Filling
- After laminating, roll out the dough into a large rectangle. Cut it into squares or rectangles, depending on the shape you want for your Danish pastries.
- Place a spoonful of your chosen filling (e.g., fruit jam, almond paste, or cream cheese) in the center of each square, then fold or twist the edges to enclose the filling or form a spiral.
- Alternatively, create a more traditional Danish shape by folding the dough to form a pinwheel or crown.
-
Proving And Baking
- Place the shaped pastries on a baking sheet lined with parchment paper. Allow them to prove for another hour, or until they’ve puffed up slightly.
- Preheat your oven to 200°C (180°C fan) or 400°F.
- Brush the pastries with egg wash to achieve a golden color and a glossy finish.
- Bake in the preheated oven for 15-20 minutes, or until the pastries are golden brown and crisp.
-
Finishing Touches
- Once baked, allow the pastries to cool on a wire rack for a few minutes.
- Drizzle with a simple glaze (a mixture of icing sugar and a bit of milk or lemon juice) or dust with powdered sugar for an extra touch of sweetness.
Tips And Tricks
- Cold Butter is Key: When laminating dough, it’s crucial that your butter is cold. If it’s too soft, it will melt into the dough rather than staying in layers, which compromises the texture of the pastry.
- Don’t Skip the Resting Time: Allowing the dough to rest between folds is essential for creating layers. This process, called “relaxation”, helps the dough to rise and develop a light, flaky texture.
- Use a Light Hand When Folding: When folding the dough over the butter, try not to press down too hard. You want to maintain the integrity of the layers. A light touch goes a long way.
- Make Ahead and Freeze: If you want to prepare your Danish pastries in advance, shape and fill them, then freeze them before the final proving stage. When you’re ready to bake, just let them thaw and prove before popping them into the oven.
- Experiment with Fillings: While classic fruit and almond fillings are wonderful, don’t be afraid to get creative. Try chocolate chips, lemon curd, or even a savory filling like ham and cheese.
Mary Berry’s Danish pastry is the epitome of a perfect morning treat-flaky, buttery, and slightly sweet. With its signature layers, rich fillings, and a golden finish, this pastry offers a refined and indulgent baking experience. Although the process may seem intricate, following Mary Berry’s detailed instructions will ensure your pastries are both delicious and impressive. Whether enjoyed with a cup of coffee or as a treat for a special occasion, these pastries embody the true essence of fine baking. Once you master the art of Danish pastry, you’ll never look at store-bought versions the same way again!
Easy Recipe Variations For Mary Berry’s Danish Pastry
Mary Berry’s Danish Pastry recipe is a classic in the world of baking. Known for its buttery, flaky layers and sweet fillings, it’s a treat that many enjoy both for its simplicity and elegance. But what if you want to switch things up and create a unique twist on this iconic pastry? Luckily, there are countless easy variations you can experiment with, each offering a delightful spin on the original.
1. Fruit Fillings
One of the most common variations involves the filling. While the classic Danish often features custard or marzipan, you can get creative with fruits. Think of using fresh or compote fruits like:
- Berries: Fresh raspberries, blueberries, or blackberries work wonderfully. You could even make a mixed berry compote and spread it inside the pastry before baking for a burst of flavor.
- Apple and Cinnamon: Slice apples thinly and sauté them with cinnamon and a little sugar for a warm, comforting filling. This variation pairs beautifully with a cup of tea.
- Peach and Almond: Sautéed peaches mixed with ground almonds make a rich, sweet filling that adds an extra layer of texture.
2. Nutty Variations
Adding nuts to your Danish Pastry not only enhances the texture but also provides a nutty flavor that pairs perfectly with the buttery dough. You can mix in chopped pistachios, almonds, or hazelnuts to the filling or sprinkle them on top before baking. A walnut and honey filling is another delightful twist, providing both sweetness and a slight crunch.
3. Chocolate And Hazelnut
For a decadently rich Danish, consider filling the pastry with a chocolate spread or a hazelnut-chocolate spread like Nutella. You can spread the chocolate over the dough, then fold it into a swirl or add small dollops of the spread and fold the dough to encase it, creating pockets of melty chocolate goodness inside.
4. Lemon And Cream Cheese
A refreshing citrusy twist is perfect for those who prefer a light and zesty filling. Mix cream cheese with lemon zest and a bit of sugar for a creamy, tangy filling. This pairs wonderfully with the richness of the dough and offers a balanced, flavorful bite. You can also add a touch of vanilla extract to enhance the overall flavor.
5. Savory Fillings
While most people think of sweet fillings, savory variants of Danish pastries are just as delightful. You can opt for a ham and cheese filling or sauté spinach and mushrooms for a delicious, sophisticated option. Adding a sprinkle of fresh herbs like thyme or rosemary can also give the pastry a beautiful aromatic edge.
6. Mini Danish Pastries
If you’re looking for bite-sized treats, consider making mini versions of the Danish pastry. Simply cut the dough into smaller squares and use the same fillings, making them easier to serve at brunches, parties, or as an afternoon snack. These miniature pastries are just as delicious but perfect for portion control.
Storing Leftovers
Mary Berry’s Danish Pastry, with its flakey layers and buttery texture, is best enjoyed fresh. However, life doesn’t always work that way, and you may have leftovers you want to preserve. Storing them properly is crucial to maintaining their texture and flavor.
Room Temperature Storage
If you plan on eating your Danish Pastry within a day or two, storing it at room temperature is usually fine. Just place it in an airtight container or wrap it in wax paper, then store it in a cool, dry place. Avoid putting it in the fridge unless necessary, as cold temperatures can cause the pastry to become soggy and lose its crispness.
Refrigeration
For longer storage, especially if you plan to keep it for more than a couple of days, you can refrigerate the Danish Pastry. However, this can sometimes affect the flakiness. To prevent this, wrap the pastries tightly in plastic wrap and place them in an airtight container. When you’re ready to eat them, you can reheat them in an oven at a low temperature (around 300°F / 150°C) for about 5-10 minutes to help restore their crispiness.
Freezing
Freezing is the best method if you want to store your Danish Pastry for a longer period. First, allow the pastries to cool completely to room temperature. Then, wrap each one individually in plastic wrap and place them in a freezer bag or airtight container. They can be frozen for up to 3 months. When ready to enjoy, simply reheat the pastries in the oven at 350°F / 175°C for about 10-15 minutes to bring them back to life. The result will be almost as good as fresh!
What To Eat With Mary Berry’s Danish Pastry?
Mary Berry’s Danish Pastry is a versatile treat that pairs wonderfully with a wide range of accompaniments, depending on the occasion. Here are some ideas for what you can serve alongside these pastries to elevate your experience:
1. Fresh Fruit And Yogurt
A light and refreshing pairing would be a bowl of fresh seasonal fruit, such as berries, melon, or citrus slices, paired with a dollop of thick Greek yogurt. The tangy yogurt provides a contrast to the sweetness of the pastry, while the fruit brings a burst of freshness.
2. Hot Beverages
A warm beverage always complements a pastry, and Mary Berry’s Danish Pastry is no exception. Consider pairing it with:
- Coffee: A rich espresso or a latte works perfectly with a sweet Danish. The bitterness of coffee cuts through the buttery sweetness of the pastry.
- Tea: Whether you prefer a classic English breakfast or an herbal option like chamomile or peppermint, tea and Danish pastries are a timeless pairing.
- Hot Chocolate: For a more indulgent experience, pair your pastry with a cup of rich hot chocolate, especially if you’re indulging in a chocolate-filled Danish.
3. Cheese
If you’re opting for a savory Danish Pastry, serving it with a small cheese board can be a delightful choice. Soft cheeses like brie, goat cheese, or cream cheese work well, along with a touch of honey or fruit preserves to add an extra layer of flavor.
4. Scrambled Eggs And Bacon
For a more substantial breakfast or brunch, you can pair a Danish Pastry with scrambled eggs and crispy bacon. The light, flaky pastry contrasts beautifully with the savory, rich eggs and the salty bacon.
5. Ice Cream
For a more decadent dessert, why not serve a warm Danish Pastry with a scoop of vanilla or cinnamon ice cream? The contrast of the warm pastry and cold ice cream will be a delightful treat for your taste buds.
Conclusion
Mary Berry’s Danish Pastry is a timeless, delicious creation that has earned its place as a favorite in kitchens around the world. Its versatility, with endless variations, allows bakers to get creative, whether they are experimenting with different fillings or adding new textures with nuts or fruits. Even though it’s a treat best enjoyed fresh, you can preserve it for later and still enjoy its flaky goodness with a few simple storage tricks. Pairing it with hot beverages, fresh fruit, or even savory sides will only enhance the experience, making it the perfect dish for any occasion, from casual breakfast to special gatherings. So, whether you’re making it for yourself or serving it to friends, Mary Berry’s Danish Pastry is sure to impress.
FAQs
What Makes Mary Berry’s Danish Pastry Recipe Different From Others?
Mary Berry’s Danish pastry recipe stands out due to its simplicity and reliability, with a focus on using buttery, flaky puff pastry combined with a rich filling, such as almond paste or fruit preserves. Unlike many other recipes that require homemade dough, Mary Berry uses ready-made puff pastry, which makes the recipe quicker and easier to prepare without sacrificing the iconic taste and texture of Danish pastries. Her step-by-step approach also ensures consistent results, making it ideal for bakers of all skill levels.
Can I Make Mary Berry’s Danish Pastry Ahead Of Time?
Yes, you can prepare Mary Berry’s Danish pastries in advance. After assembling the pastries, you can cover them with cling film and refrigerate them for up to 24 hours before baking. This allows the pastries to rise slowly in the fridge, improving the flavor. Alternatively, you can freeze the unbaked pastries and bake them directly from the freezer when needed, though they might need an extra 5-10 minutes in the oven. Be sure to let them cool before storing for later use.
What Type Of Filling Can I Use For Mary Berry’s Danish Pastry?
Mary Berry’s recipe offers a variety of filling options to suit different tastes. You can stick with the classic almond paste filling, which is made from ground almonds, butter, sugar, and egg. For a fruitier option, fillings such as raspberry jam, apricot glaze, or fresh cream cheese with fruit work wonderfully. Feel free to get creative with combinations of fruit and nut fillings, or even chocolate for a more indulgent treat. Just be sure not to overfill the pastry to maintain its delicate texture when baking.