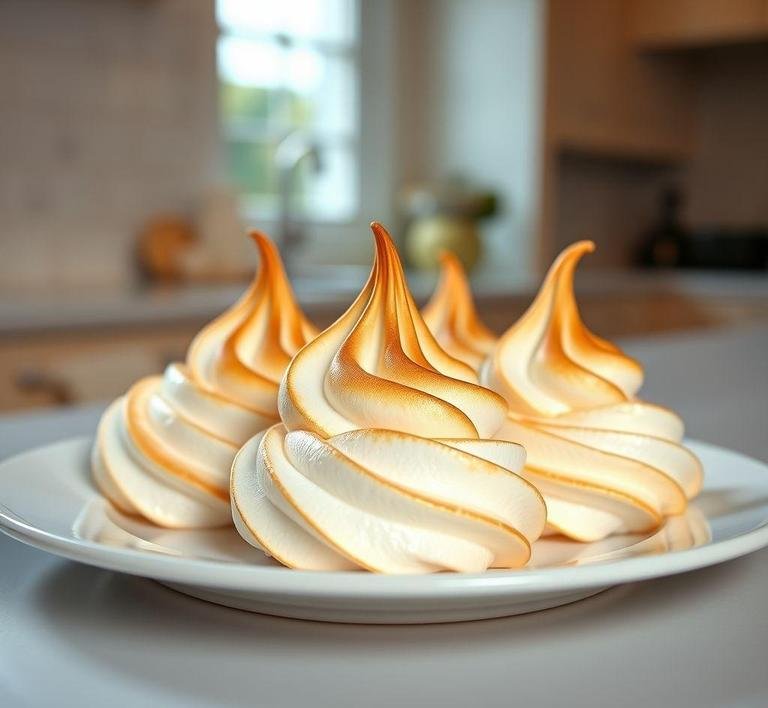
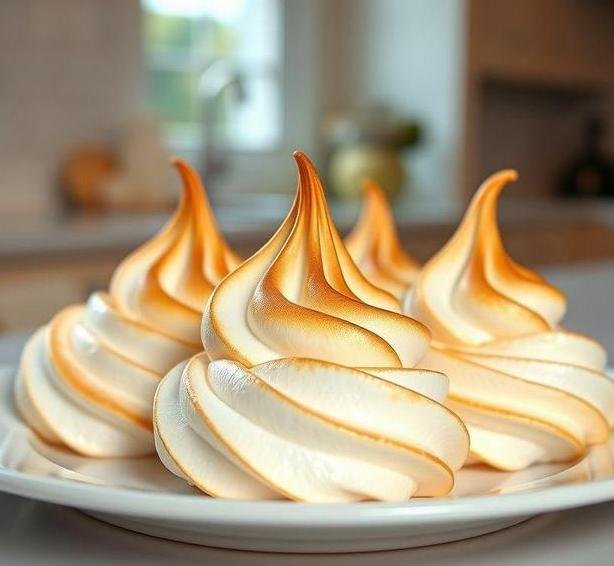
Mary Berry’s Coconut Meringue Slices are a nostalgic and decadent dessert that combines layers of texture and flavor in a way only the beloved British baking queen can deliver. These slices consist of a buttery shortbread-like base, spread with a tangy jam (typically raspberry or strawberry), and then topped with a fluffy coconut meringue that’s baked to golden perfection.
The result? A bar that’s crispy on top, gooey and sweet in the middle, and rich and crumbly at the base. It’s a wonderful fusion of textures – the soft chew of coconut, the airy crunch of meringue, and the melt-in-your-mouth biscuit layer. Perfect for afternoon tea, lunchboxes, or just when you fancy a sweet bite with your coffee.
Mary Berry’s Coconut Meringue Slices Recipe
Ingredients Needed
Let’s break down the components into three key layers: the base, the jam, and the meringue topping.
For The Base
- 100g (3.5 oz) butter, softened – This forms the fat that makes the base rich and tender.
- 50g (1.75 oz) caster sugar – Adds sweetness and helps the base brown nicely.
- 100g (3.5 oz) self-raising flour – Creates a light, slightly risen base.
For The Filling
- Raspberry jam (around 2-3 tablespoons) – Choose a good-quality, slightly tart jam to balance the sweetness of the meringue.
For The Coconut Meringue
- 2 large egg whites – These whip up into the glossy, airy structure of the meringue.
- 100g (3.5 oz) caster sugar – For sweetening and stabilizing the meringue.
- 50g (1.75 oz) desiccated coconut – Adds texture, flavor, and a rustic chewiness.
Equipment Needed
To prepare this recipe like Mary herself, you don’t need a fancy kitchen setup – just some basics:
- Mixing bowls (preferably glass or metal for whipping egg whites)
- Electric mixer or stand mixer (you can do it by hand, but it’s a workout!)
- Spatula and wooden spoon
- Baking tin (approximately 28cm x 18cm / 11in x 7in)
- Baking parchment or greaseproof paper
- Sieve (for flour)
- Weighing scale or measuring cups
- Cooling rack
- Offset spatula or spoon for spreading jam
Instructions To Make Mary Berry’s Coconut Meringue Slices
Here’s where the magic happens. Take it step-by-step and don’t rush – baking is as much about the journey as it is about the result!
1. Preheat And Prepare
Start by preheating your oven to 160°C fan / 180°C / 350°F / Gas 4. Grease your baking tin and line it with parchment paper to make slicing and removing the bars easier later.
2. Make The Base
In a bowl, cream together the butter and caster sugar until pale and fluffy. This step is key for a light texture.
Sift in the self-raising flour and fold gently until the mixture becomes a soft dough. Press this evenly into the prepared tin, smoothing the surface with the back of a spoon or your fingers.
Bake for 15-20 minutes until lightly golden. It should still be pale, as it will continue to cook later.
3. Spread The Jam
Once out of the oven, let the base cool for a few minutes. Then, gently spread a layer of raspberry jam across the surface. Be careful not to tear the base – a thin, even layer is all you need.
4. Make The Meringue
In a clean bowl, whisk the egg whites to soft peaks. Then gradually add the sugar, a spoonful at a time, while continuing to whisk until the mixture is glossy and holds stiff peaks.
Fold in the desiccated coconut gently using a spatula – you don’t want to deflate the meringue!
5. Assemble And Bake Again
Spoon the coconut meringue over the jam layer and spread it evenly. You can use a fork to create decorative swirls or peaks on the surface.
Return to the oven and bake for another 25-30 minutes, until the meringue is golden brown and slightly crisp on top.
6. Cool And Slice
Allow to cool in the tin for 10-15 minutes, then carefully lift out using the parchment paper. Once fully cooled, cut into slices or bars.
Tips And Tricks
✔️ Use Room Temperature Eggs
Room temp eggs whip better and produce a more stable meringue. Cold whites won’t trap as much air.
✔️ Don’t Overbake
The meringue should be crisp on the outside but soft and chewy on the inside. Overbaking dries it out and makes it crumbly.
✔️ Jam Choices Matter
Tart jams like raspberry or blackcurrant balance the sweetness of the meringue beautifully. Avoid overly sweet jams, which can make the slice cloying.
✔️ Neat Slicing Hack
Dip a sharp knife in hot water and wipe it between cuts to get clean, bakery-style slices.
✔️ Storage
These slices keep well in an airtight container for up to 4 days. If your kitchen is humid, the meringue may soften slightly – but they’ll still be delicious.
Mary Berry’s Coconut Meringue Slices are more than just a dessert – they’re a bite of traditional British baking heritage, dressed up with tropical flair. With their tender biscuit base, tangy jam filling, and sweet coconut-studded meringue crown, these slices are a crowd-pleaser for any occasion. They’re simple yet sophisticated, and mastering them will definitely earn you some brownie points (or should we say slice points?) with family and friends.
So put the kettle on, get your ingredients ready, and channel your inner Mary – because once you try these slices, you’ll be making them on repeat.
Easy Recipe Variations For Mary Berry’s Coconut Meringue Slices
Mary Berry’s original Coconut Meringue Slices are a masterclass in balance. You’ve got that buttery shortbread-style base, a generous layer of raspberry jam, and a glossy coconut-flecked meringue baked to perfection. But here’s the beauty of baking-once you’ve nailed the basics, you can play.
Let’s explore a few easy, approachable, and downright delectable variations:
1. Tropical Twist
Swap the raspberry jam for a tangy mango or passionfruit curd. These tropical flavors cut through the sweetness of the meringue and elevate the coconut, giving the slices a sun-kissed, beachy vibe. For an added boost, sprinkle in a few chopped pineapple pieces into the meringue before baking.
2. Chocolate Coconut Delight
If you’re a chocoholic, you’ll love this. Spread a thin layer of Nutella or melted dark chocolate over the base before adding your meringue. It’s a simple change but gives that rich, luxurious edge. You can also fold in a few dark chocolate chips into the meringue for bursts of indulgence with every bite.
3. Berry Medley Upgrade
Why settle for just raspberry? A mixed berry jam-strawberry, blueberry, and blackberry-adds complexity and a gorgeous jewel-toned hue beneath the snowy meringue. It’s great for those who like their desserts fruity but not too sweet.
4. Nutty Coconut Crunch
Add texture and nutty depth by incorporating toasted almonds or chopped pistachios into the meringue layer. Toasting the nuts before mixing them in really enhances their flavor and gives a pleasant crunch that contrasts beautifully with the soft base and fluffy meringue.
5. Gluten-Free Version
Switch out the regular flour in the base with a reliable gluten-free blend (look for one that contains xanthan gum to maintain structure). You won’t even notice the difference in texture, especially when the rich butter and jam flavors are doing most of the heavy lifting.
These variations are easy to execute and offer a fun way to make the classic recipe your own-whether you’re baking for a party, experimenting in the kitchen, or just craving something different.
Storing Leftovers
Now, say you managed to resist devouring the entire tray-first of all, congratulations. So what do you do with the leftovers to keep them tasting as fresh and fabulous as when they came out of the oven?
1. Room Temperature (Short Term)
Coconut meringue slices will keep well in an airtight container at room temperature for up to 3 days. Make sure they’re completely cool before storing to prevent condensation (which leads to sogginess). Separate layers with parchment paper if stacking to keep that delicate meringue intact.
2. Refrigeration (Medium Term)
If your kitchen is particularly warm or humid, consider refrigerating the slices. They’ll last up to 5 days, though refrigeration may soften the meringue slightly. Still, it’s better than a sticky or spoiled slice! Again, store in an airtight container and bring them to room temperature before serving for the best flavor.
3. Freezing (Long Term)
Yes, you can freeze them! These slices freeze surprisingly well. Place them in a single layer on a baking sheet to flash-freeze for about an hour, then transfer them into freezer bags or a lidded container. They’ll last up to 2 months. Thaw at room temperature, and if you want to crisp them up slightly, pop them in a low oven for 5-10 minutes.
Tip: Always label your containers with the date, because no one wants to play freezer roulette.
What To Eat With Mary Berry’s Coconut Meringue Slices?
On their own, these slices are wonderfully satisfying. But why not dress things up a bit? Whether you’re setting a teatime table or crafting a dessert platter, pairing the slices with the right accompaniments can transform them into a showstopper experience.
1. Classic Tea Or Coffee
There’s a reason Mary Berry is the queen of afternoon tea. These slices are the perfect companion to a strong Earl Grey, delicate Darjeeling, or even a fragrant jasmine green tea. Prefer coffee? Go for a cappuccino or a smooth flat white-the creamy notes pair beautifully with the crispy meringue.
2. Fresh Fruit
Balance the sweetness with a side of fresh berries-raspberries, strawberries, or blueberries work wonderfully. A few slices of kiwi or mango also add a fresh, zesty contrast to the richness of the dessert.
3. Cream Or Yogurt
Serve a slice with a dollop of whipped cream, clotted cream, or even Greek yogurt for a luxurious touch. The tang of yogurt, in particular, complements the sweetness of the meringue and jam perfectly.
4. Ice Cream Or Sorbet
Feeling indulgent? A scoop of vanilla bean ice cream or coconut sorbet turns a slice into a full-blown plated dessert. For something extra special, try lemon sorbet-its tartness refreshes the palate between bites.
5. Dessert Wine Or Liqueur
If you’re hosting a dinner party, a glass of Muscat, Sauternes, or even a coconut-flavored liqueur like Malibu adds an adult twist to your dessert spread. Just a splash enhances the coconut and sweet berry notes marvelously.
Conclusion
Mary Berry’s Coconut Meringue Slices are a true gem in the realm of classic British baking-simple yet sublime, elegant yet comforting. With their layers of buttery base, sweet jam, and airy coconut meringue, they strike a beautiful balance that’s hard to beat.
But what makes them even more wonderful is how easily they adapt. With just a few tweaks, you can reinvent the classic to suit any taste or occasion. Whether you’re experimenting with tropical flavors, adding a chocolatey indulgence, or going gluten-free, there’s room to make this recipe uniquely yours.
Remember to store them properly to keep that delightful contrast of textures intact, and don’t be afraid to pair them with a bit of flair-from a steaming cup of tea to a scoop of creamy ice cream.
At the end of the day, these slices aren’t just a treat-they’re a little slice of joy. So go ahead, bake a batch, get creative, and most importantly-enjoy every crumb.
FAQs
What Are The Key Ingredients In Mary Berry’s Coconut Meringue Slices Recipe?
Mary Berry’s coconut meringue slices require simple ingredients, including egg whites, caster sugar, and shredded coconut. The base is made using a buttery shortcrust pastry, which provides a rich contrast to the light, crispy coconut meringue topping. Additionally, you’ll need a little vanilla extract and a pinch of salt to enhance the flavor.
How Long Does It Take To Make Mary Berry’s Coconut Meringue Slices?
The preparation and baking time for Mary Berry’s coconut meringue slices is about 1 hour and 15 minutes in total. This includes around 15-20 minutes for preparation, and approximately 1 hour for baking. It’s important to allow the slices to cool before cutting them into squares for serving.
Can I Make Mary Berry’s Coconut Meringue Slices In Advance?
Yes, Mary Berry’s coconut meringue slices can be made in advance. Once baked and cooled, store them in an airtight container at room temperature for up to 3 days. If you prefer to make them even earlier, they can also be frozen. Just wrap the slices tightly in plastic wrap and foil, then store them in the freezer for up to a month. Thaw them at room temperature before serving.