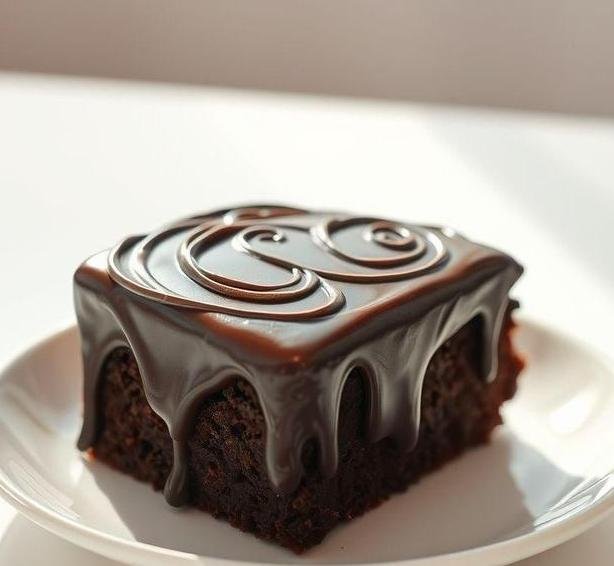
Mary Berry’s Chocolate Fudge Icing is a rich, indulgent, and smooth topping that is perfect for a variety of baked goods, from spongy cakes to decadent brownies. This icing is often praised for its perfect balance of sweetness and chocolatey depth, making it a go-to choice for anyone seeking to elevate their dessert game. What sets this icing apart is its creamy consistency, which is ideal for spreading on cakes or even piping decorative details. Its luxurious texture also makes it incredibly versatile-whether you’re looking for a glossy finish on a birthday cake or a smooth coating on cupcakes, Mary Berry’s chocolate fudge icing delivers every time.
The recipe, originally popularized by the legendary British baker Mary Berry, has become a staple in many kitchens, thanks to its easy-to-follow method and the ability to impress with minimal ingredients. The fudge aspect refers to the smooth and slightly firm texture, which is often achieved by incorporating ingredients like butter and dark chocolate that create a luxurious mouthfeel once it’s set. The result is a glossy, perfectly velvety icing that adds both flavor and visual appeal to your bakes.
Mary Berry’s Chocolate Fudge Icing Recipe
Ingredients Needed

To make Mary Berry’s Chocolate Fudge Icing, you’ll need just a handful of simple ingredients. These are common pantry staples that, when combined, create an irresistible and smooth chocolate topping. Here’s what you’ll need:
- Dark Chocolate (about 200g): The base of this icing is rich, dark chocolate. The bitterness of the dark chocolate balances the sweetness of the other ingredients, giving the icing a deep, satisfying flavor. It’s essential to use high-quality chocolate for the best result, as this will influence the flavor and texture of the icing.
- Butter (around 100g): Butter is key in achieving the creamy, smooth consistency that defines this chocolate fudge icing. It adds richness and helps the icing set in a glossy, firm layer without being overly stiff.
- Golden Syrup (2 tablespoons): Golden syrup is a quintessential British ingredient that gives the icing its subtle sweetness and slight caramel flavor. It helps the icing achieve a smooth texture and adds a glossy finish.
- Icing Sugar (250g): Icing sugar, or powdered sugar, ensures that the icing will be smooth and easily spreadable. This ingredient also helps sweeten the icing to balance the bitterness of the dark chocolate.
- A Dash of Water (optional): Sometimes a small splash of water is needed to adjust the consistency of the icing. This ensures it is spreadable without being too thick or runny.
Equipment Needed
Mary Berry’s Chocolate Fudge Icing doesn’t require any special equipment, so it’s perfect for home bakers of all levels. However, a few key items will make the process easier and more efficient:
- Saucepan: A medium-sized saucepan is essential for melting the butter and chocolate. You’ll want to gently heat these ingredients together until they melt into a smooth mixture. A heavy-bottomed saucepan is recommended to avoid burning the chocolate.
- Heatproof Mixing Bowl: While not strictly necessary, using a heatproof bowl can be helpful if you prefer to melt the chocolate over a bain-marie (double boiler). This can prevent the chocolate from seizing up due to direct heat.
- Wooden Spoon or Whisk: You’ll need a wooden spoon or whisk to stir the ingredients together and ensure they blend smoothly.
- Spatula: A spatula is useful for scraping every last bit of the glossy, chocolatey goodness out of the pan and onto your cake or cupcakes.
- Cake or Cupcake: Of course, you’ll need your baked goods ready to be topped with the icing. Whether it’s a simple sponge cake or a batch of cupcakes, this icing will provide a flawless finish.
Instructions To Make Mary Berry’s Chocolate Fudge Icing
Making Mary Berry’s Chocolate Fudge Icing is straightforward and doesn’t require advanced baking skills. Here’s how to do it:
- Melt the Chocolate and Butter: In a medium saucepan over low heat, combine the dark chocolate and butter. Stir constantly to prevent the chocolate from burning. Once fully melted and smooth, remove the saucepan from the heat.
- Add the Golden Syrup: Stir in the golden syrup until it is fully combined with the melted chocolate and butter. This addition will give the icing its signature shine and subtle sweetness.
- Sift the Icing Sugar: In a separate bowl, sift the icing sugar to remove any lumps. This step is crucial for ensuring the icing is smooth and creamy. Gradually fold the sifted icing sugar into the chocolate mixture, stirring gently until fully incorporated.
- Adjust the Consistency: If the mixture seems too thick, add a small splash of water (a teaspoon at a time) until you reach a spreadable consistency. Be careful not to add too much water, as this can cause the icing to become too runny.
- Let the Icing Cool Slightly: Allow the icing to cool for a few minutes before spreading it onto your cakes. This will help the icing set more easily without dripping off the edges.
- Apply the Icing: Using a spatula or butter knife, spread the chocolate fudge icing generously over your cake or cupcakes. If you’re decorating, you can use a piping bag to create intricate designs.
- Let the Icing Set: Allow the icing to set at room temperature. As it cools, it will firm up slightly, providing a smooth, glossy finish that’s perfect for serving.
Tips And Tricks
- Use High-Quality Chocolate: Since chocolate is the primary ingredient, using good-quality dark chocolate (at least 70% cocoa) will make a noticeable difference in flavor. The richer the chocolate, the more complex the flavor of your icing will be.
- Work with the Temperature: Make sure that the butter and chocolate mixture cools a little before adding the icing sugar. This helps prevent the sugar from melting into the chocolate, which could result in a runny icing.
- Achieve the Right Consistency: If your icing is too thin, add more sifted icing sugar. If it’s too thick, add a little water, but do so gradually. The icing should be smooth, spreadable, and not too runny.
- Decorating with Icing: If you want to pipe the icing, allow it to cool until it’s a little thicker. You can then use a piping bag to create beautiful decorations, such as rosettes or swirls, on cupcakes or cakes.
- Storing Leftovers: If you have any leftover icing, you can store it in an airtight container at room temperature for up to 2 days. If it firms up too much, just warm it slightly over low heat or stir in a bit of water to loosen it up.
Mary Berry’s Chocolate Fudge Icing is a timeless classic that combines simplicity with indulgence. Its smooth, glossy finish and rich, deep chocolate flavor make it the perfect topping for cakes, cupcakes, or even brownies. Whether you’re an experienced baker or just starting, this icing is easy to make and will impress anyone with its silky texture and luscious taste. With a few basic ingredients and a straightforward method, you can create a decadent icing that elevates any dessert. Try it for your next baking project, and you’ll see why it’s a beloved recipe for many.
Easy Recipe Variations For Mary Berry’s Chocolate Fudge Icing
Mary Berry’s chocolate fudge icing is a rich, decadent treat that has won the hearts of many bakers. It’s smooth, velvety, and the perfect topping for a variety of cakes, cupcakes, and even brownies. But sometimes, you might want to experiment with it, giving your cake a unique twist while still maintaining that classic, indulgent flavor. Here are a few easy recipe variations that will elevate your chocolate fudge icing:
1. Mint Chocolate Fudge Icing
One of the most popular variations of chocolate fudge icing is mint chocolate. Adding a few drops of peppermint extract to the icing transforms it into a fresh, minty delight. This pairs perfectly with a chocolate cake or even a batch of homemade brownies. The cool, refreshing taste of mint balances the richness of the chocolate, creating a delicious contrast.
To Make
- Add 1 teaspoon of peppermint extract to your original fudge icing recipe.
- You can also fold in some finely chopped mint chocolate for an extra burst of flavor.
2. Coffee-Infused Chocolate Fudge Icing
For coffee lovers, adding a hint of espresso or strong coffee to your chocolate fudge icing creates a deep, complex flavor that enhances the chocolate’s richness. The bitterness of coffee complements the sweetness of the fudge, making it the perfect pairing for cakes like a mocha-flavored sponge or even a dense, dark chocolate cake.
To Make
- Dissolve 1 tablespoon of instant coffee or espresso powder into 1 tablespoon of hot water.
- Stir this coffee mixture into the fudge icing, along with the other ingredients.
3. Caramelized Hazelnut Chocolate Fudge Icing
If you’re looking to add some crunch and nutty flavor to your icing, caramelized hazelnuts are a fantastic addition. They bring a toasty, sweet richness that pairs wonderfully with the chocolate fudge. The combination of smooth icing and crunchy nuts creates an irresistible texture contrast.
To Make
- Roughly chop toasted hazelnuts and caramelize them by gently heating in a pan with a little sugar until golden and sticky.
- Fold these into your icing for a delightful, nutty finish.
4. Orange Zest Chocolate Fudge Icing
A citrus twist always brightens up chocolate, and orange zest adds a vibrant flavor that works wonderfully with fudge icing. It provides a fresh, zesty undertone to the otherwise rich and creamy chocolate, creating a balanced and sophisticated icing for cakes like sponge or flourless chocolate cakes.
To Make
- Add the zest of one orange to your chocolate fudge icing and mix well.
- You could also add a tablespoon of orange juice if you want a more pronounced citrus flavor.
5. Dark Chocolate Fudge Icing
For those who prefer a more intense chocolate flavor, swapping out milk chocolate for dark chocolate will yield a slightly less sweet, more robust icing. Dark chocolate fudge icing has a more complex flavor profile, perfect for those who appreciate a richer chocolate experience.
To Make
- Use 70% cocoa dark chocolate instead of milk chocolate in your recipe for a deeper, richer taste.
- You may need to adjust the amount of sugar to account for the bitterness of the dark chocolate.
Storing Leftovers
Mary Berry’s chocolate fudge icing is so indulgent that you might end up with leftovers after your baking adventure. Luckily, storing it is easy, and when done properly, it can last for several days. Here’s everything you need to know about storing leftover chocolate fudge icing:
In The Refrigerator
Chocolate fudge icing can be stored in an airtight container in the refrigerator for up to one week. If you plan to store it for a longer period, you can freeze it (we’ll get to that in a moment). When you store it in the fridge, the icing will solidify and harden a bit, but it’s easy to bring it back to its creamy texture with a little TLC.
To Store
- Place the leftover icing in an airtight container, ensuring there’s no exposure to air.
- If the icing has been left to cool completely, it should be fine for refrigeration.
Reheating
When you’re ready to use the leftover icing again, it may be a little firm due to the cold temperature. To bring it back to its silky, spreadable consistency, gently reheat it. You can do this by either placing it in a microwave-safe bowl and heating it in short bursts of 10-15 seconds, stirring in between. Alternatively, you can warm it up gently over a pot of simmering water using the double boiler method.
Freezing
Chocolate fudge icing also freezes well, which is handy if you have more than enough. The key to freezing it properly is to ensure that the icing is in an airtight container or a freezer-safe ziplock bag to avoid any freezer burn. It can last in the freezer for up to three months.
To Freeze
- Spoon the icing into a container or a freezer bag, removing as much air as possible.
- Label the container with the date, so you’ll know when it needs to be used.
When you’re ready to use the frozen icing, let it thaw in the fridge overnight, and then gently reheat it as you would with refrigerated icing.
What To Eat With Mary Berry’s Chocolate Fudge Icing?
Mary Berry’s chocolate fudge icing is versatile and can complement a variety of baked goods. While it is undoubtedly delicious on its own, pairing it with the right desserts takes it to a whole new level of indulgence. Here are some ideas on what to eat with it:
Chocolate Cakes
It goes without saying that chocolate fudge icing is the perfect match for chocolate cakes. Whether you opt for a classic chocolate sponge, a flourless chocolate cake, or even a decadent lava cake, the icing is an essential finishing touch. It intensifies the chocolate flavor and adds a smooth, creamy texture that enhances the experience.
Cupcakes
Top your cupcakes with Mary Berry’s chocolate fudge icing for a rich and satisfying bite. Whether you’re making vanilla, chocolate, or even red velvet cupcakes, this icing is guaranteed to elevate the flavor profile. You can even pipe it into intricate designs for a bakery-worthy finish.
Brownies And Bars
Another fantastic use for chocolate fudge icing is on brownies or bars. It adds a glossy finish and extra sweetness to the dense, fudgy texture of the brownies. Pairing it with nuts like walnuts or pecans, or even a drizzle of caramel sauce, takes your brownies to gourmet level.
Biscotti And Shortbread
For a lighter pairing, drizzle a little bit of chocolate fudge icing over biscotti or shortbread biscuits. This is a great way to give simple, buttery treats a rich chocolate boost without overpowering them. The contrast between the crumbly texture of the biscuits and the smoothness of the icing creates a wonderful balance.
Fruit-Based Desserts
Don’t shy away from pairing chocolate fudge icing with fruit-based desserts! The richness of the fudge icing goes surprisingly well with the tartness of berries or even roasted fruits like pears or apples. You can drizzle it over a fruit tart, or spoon some over a bowl of fresh strawberries for a quick indulgence.
Conclusion
Mary Berry’s chocolate fudge icing is a baker’s dream-it’s versatile, easy to make, and elevates any dessert with its creamy texture and intense chocolate flavor. From the classic cake and cupcake toppers to unique variations with mint, orange zest, or coffee, there’s no limit to the ways you can enjoy it. Plus, it’s easy to store, and if you happen to have leftovers, you can enjoy them days later with just a little reheating.
Whether you’re planning a big celebration or just want to indulge in something sweet, this icing will never let you down. It’s a timeless addition to any dessert arsenal, and its rich, velvety texture will make sure your baked goods are the star of the show.
FAQs
What Are The Key Ingredients In Mary Berry’s Chocolate Fudge Icing?
Mary Berry’s chocolate fudge icing recipe typically requires simple ingredients: dark chocolate, butter, icing sugar, and a bit of boiling water. The chocolate is melted with butter and then combined with icing sugar to create a smooth, glossy texture. The water helps in achieving the right consistency for spreading.
How Can I Make Mary Berry’s Chocolate Fudge Icing Thicker Or Thinner?
To adjust the thickness of Mary Berry’s chocolate fudge icing, you can add more icing sugar if you prefer a thicker, more stable texture. If you’d like it thinner, simply add a small amount of boiling water or milk, a teaspoon at a time, until you reach the desired consistency for spreading or piping.
Can I Use Milk Chocolate Instead Of Dark Chocolate In Mary Berry’s Fudge Icing Recipe?
While Mary Berry’s recipe specifically calls for dark chocolate to give a rich, intense flavor, you can substitute milk chocolate if you prefer a sweeter, creamier taste. Keep in mind that milk chocolate will result in a slightly less firm icing, so you may need to adjust the ratio of butter and icing sugar to compensate.