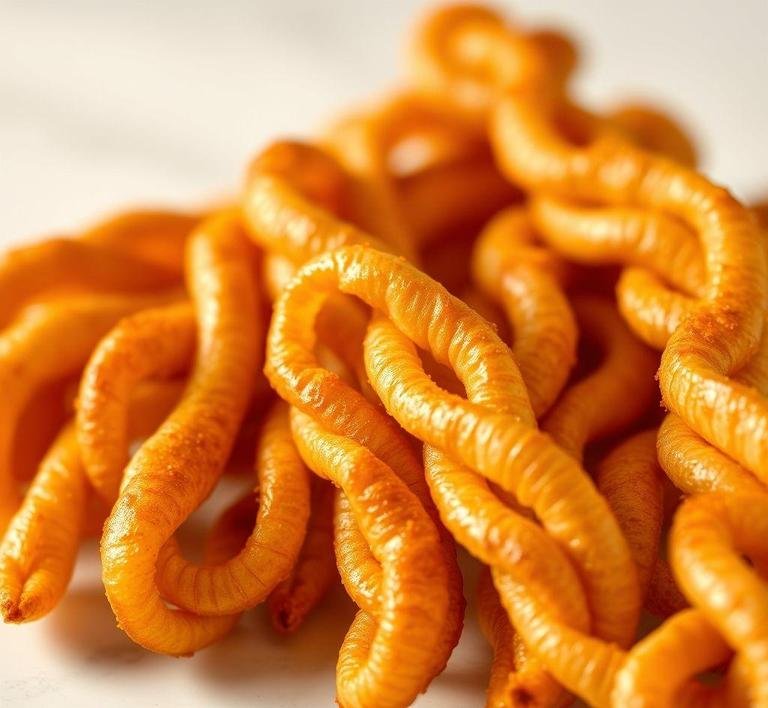
Mary Berry’s Cheese Straws are a delicious, savory snack that’s as simple as it is mouthwatering. Known for her comforting and homely baking recipes, Mary Berry’s take on cheese straws is a perfect balance between crispy, flaky pastry and the rich, savory taste of cheese. These treats are a popular choice for afternoon tea, casual gatherings, or as a quick snack when you’re craving something delicious and satisfying.
Cheese straws are traditionally made by incorporating grated cheese into a buttery, crisp pastry dough, which is then rolled out, cut into thin strips, and baked until golden brown. Mary Berry’s version is known for its rich flavor, delicate texture, and just the right amount of cheesy goodness. The flavor profile is intensely savory, often enhanced with mustard powder or paprika to give it that extra kick. Their versatility makes them a crowd-pleaser, as they can be served on their own, or paired with a variety of dips, from chutneys to creamy dips or even a glass of wine.
Whether served warm or at room temperature, these cheese straws are always a hit, and thanks to Mary Berry’s simple approach, they are also a great recipe for beginner bakers. The best part? They come together quickly, so you won’t be stuck in the kitchen for hours.
Mary Berry’s Cheese Straws Recipe
Ingredients Needed
To make Mary Berry’s Cheese Straws, you will need a handful of essential ingredients. They are typically found in most kitchens, which makes this a straightforward recipe to prepare.
Basic Ingredients
- Puff Pastry (1 sheet) – The foundation of your cheese straws, the puff pastry is key to creating the signature light, flaky texture. You can either use ready-made puff pastry, which is a huge time-saver, or make your own if you’re feeling more ambitious.
- Cheddar Cheese (100g, finely grated) – A sharp, mature cheddar works best to provide a bold flavor, but you can also experiment with other hard cheeses like Parmesan or Gruyère for a slightly different taste.
- Butter (50g) – Adds richness and helps bind the pastry together.
- Mustard Powder (1 tsp) – A key ingredient to give a subtle tang and extra depth of flavor. While this is optional, it adds a lovely sharpness that balances the richness of the cheese.
- Paprika (½ tsp) – This optional ingredient gives the cheese straws a warm, smoky undertone and a hint of color. You can substitute this with cayenne pepper if you prefer a bit of heat.
- Salt (to taste) – Helps to bring out the flavor of the cheese.
- Black Pepper (to taste) – Freshly ground pepper will elevate the savory taste of the cheese straws.
- Egg (1, beaten) – Used for glazing the straws before baking to give them a lovely golden sheen.
Optional Ingredients
- Fresh Herbs (like thyme or rosemary, finely chopped) – Adds a fresh, earthy flavor if you want to experiment with extra seasoning.
- Chili Flakes – For a spicier kick.
Equipment Needed
The equipment required to make Mary Berry’s Cheese Straws is minimal, making it a great recipe for novice bakers. You don’t need anything fancy or specialized; just a few essential tools.
- Baking Tray – A flat, sturdy baking tray lined with parchment paper or a silicone mat. This ensures that your cheese straws don’t stick and bake evenly.
- Rolling Pin – Essential for rolling out the puff pastry into an even thickness.
- Grater – For grating the cheese finely, which helps it melt into the pastry evenly.
- Sharp Knife or Pizza Cutter – To cut the pastry into thin strips. You can also use a fluted pastry cutter for a more decorative edge.
- Pastry Brush – Used for brushing the beaten egg glaze over the pastry before baking, creating that golden, crispy finish.
- Oven – A conventional oven is required to bake the cheese straws at the right temperature, ensuring they puff up beautifully and turn golden brown.
- Measuring spoons – For accurate measurement of the dry ingredients like mustard powder and paprika.
Instructions To Make Mary Berry’s Cheese Straws
Now that you have your ingredients and equipment ready, let’s dive into the step-by-step instructions on how to make these irresistible cheese straws.
-
Preheat the Oven:
Start by preheating your oven to 220°C (200°C fan/gas mark 7). This high heat helps the puff pastry to rise quickly and turn golden brown.
-
Prepare the Baking Tray:
Line your baking tray with parchment paper or a silicone baking mat to prevent the cheese straws from sticking during baking.
-
Grate the Cheese:
Using a fine grater, grate your cheddar cheese. The finer the grating, the better it will melt into the pastry. Measure out 100g and set it aside.
-
Roll Out the Pastry:
Unfold the sheet of puff pastry on a lightly floured surface. Use a rolling pin to roll it out gently until it’s about 2-3mm thick. Try to keep it as even as possible for uniform baking.
-
Add the Cheese and Seasoning:
Sprinkle the grated cheese evenly across the surface of the pastry. Add the mustard powder, paprika, salt, and pepper to taste. If you want to add herbs or chili flakes, sprinkle them over the cheese as well.
-
Fold and Roll:
Fold the pastry in half, bringing the two edges together so that the cheese is sandwiched inside. Press down lightly to seal the edges.
-
Cut into Strips:
Using a sharp knife or pizza cutter, cut the pastry into thin strips, about 1-2 cm wide. You can make them longer or shorter, depending on your preference.
-
Brush with Egg Wash:
Beat the egg in a small bowl and use a pastry brush to lightly glaze each strip of pastry with the egg wash. This step ensures that your cheese straws will have a lovely golden sheen when they bake.
-
Bake:
Place the cheese straws on the prepared baking tray, ensuring they’re not overcrowded. Bake in the preheated oven for 12-15 minutes or until they’re golden brown and puffed up.
-
Cool and Serve:
Once baked, remove the cheese straws from the oven and allow them to cool slightly on a wire rack. Serve them warm or at room temperature for the best flavor and texture.
Tips And Tricks
- Chill the Pastry: If you’re working with homemade pastry or if the puff pastry has become soft while handling it, refrigerate the rolled-out dough for 15-20 minutes before cutting. This will prevent the pastry from losing its structure during baking.
- Be Generous with Cheese: Don’t be afraid to pile on the cheese! The more cheese you use, the richer and more flavorful your cheese straws will be. Just ensure it’s evenly spread across the pastry for consistent flavor in every bite.
- Use a Cheese with Good Melting Qualities: While cheddar is a classic, using a mixture of cheeses like Gruyère or Parmesan can add complexity to the flavor. Gruyère, in particular, melts beautifully and adds a nutty, savory element.
- Experiment with Flavors: While Mary Berry’s recipe is simple and perfect as it is, you can customize your cheese straws with herbs like rosemary, thyme, or sage. A pinch of cayenne pepper or chili flakes can also add a zesty kick if you enjoy a little spice.
- Don’t Overbake: Watch your cheese straws closely towards the end of baking. Puff pastry can burn quickly, so remove them from the oven once they’re golden brown and crisp, but not overly dark.
Mary Berry’s Cheese Straws are a delightful and timeless treat, offering the perfect combination of buttery, flaky pastry and rich, savory cheese. Their simplicity and versatility make them ideal for any occasion, from an elegant afternoon tea to a casual family gathering. With just a handful of basic ingredients and minimal equipment, you can create a batch of golden, cheesy straws that are sure to impress.
Whether you stick to Mary Berry’s classic recipe or add your own twist with herbs and spices, these cheese straws are guaranteed to be a hit. They are quick to make, and with a little practice, you’ll master the art of crafting these crispy, golden delights. So, next time you’re looking for a savory snack that’s both comforting and impressive, look no further than these irresistible cheese straws-perfectly flaky, perfectly cheesy, and perfectly delicious!
Easy Recipe Variations For Mary Berry’s Cheese Straws
Mary Berry’s Cheese Straws are a classic savory snack beloved by many for their crisp texture and irresistible cheesy flavor. While the basic recipe is already a hit, there are numerous ways to elevate the dish with easy variations that can cater to various tastes and dietary preferences. Here are a few delightful twists to give your cheese straws a little extra zing:
-
Herb-Infused Cheese Straws:
Adding fresh herbs can transform the flavor profile of your cheese straws. Try mixing in finely chopped rosemary, thyme, or basil into the dough for a fragrant and herbaceous twist. The earthy notes of rosemary pair especially well with the richness of the cheese, while basil can introduce a fresh, Mediterranean vibe. Alternatively, you could sprinkle some dried herbs on top of the cheese before baking to add texture and flavor.
-
Spicy Cheese Straws:
For those who like a bit of heat, incorporating spices like chili powder, cayenne pepper, or smoked paprika will give your cheese straws a fiery kick. You can adjust the heat level depending on your preferences, or even create a layered effect by combining mild and spicy cheeses (such as cheddar with a bit of blue cheese or jalapeño cheddar).
-
Cheese Combinations:
While cheddar is the traditional cheese used in cheese straws, experimenting with different cheeses can open up a world of flavor possibilities. A combination of sharp cheddar and creamy cream cheese creates a delightful texture, while using Gruyère or Parmesan can add a nutty, sophisticated flavor. You could even try mixing in some crumbled feta or blue cheese for an exciting twist.
-
Sweet and Savory Cheese Straws:
If you enjoy the contrast of sweet and savory flavors, consider adding a touch of honey, maple syrup, or brown sugar to your cheese straw dough. These additions can provide a subtle sweetness that balances the richness of the cheese. To take it a step further, you could sprinkle a light dusting of cinnamon or nutmeg on top of the straws before baking, creating a unique sweet-savory pairing.
-
Vegetarian or Gluten-Free Cheese Straws:
For those with dietary restrictions, creating a gluten-free version of cheese straws is easy. Simply swap the regular flour for a gluten-free flour blend. You can also experiment with alternative flours such as almond flour or chickpea flour for a different texture and taste. For a vegetarian (and even vegan) option, use plant-based cheeses and non-dairy butter or margarine to craft a dairy-free version of the beloved snack.
-
Cheese and Bacon Straws:
For an extra indulgence, add crispy bacon bits to the dough. The smoky flavor of bacon blends beautifully with the sharpness of the cheese, creating a satisfying, savory bite. You could also experiment with other meats, like cooked sausage or prosciutto, if you’re looking to mix it up.
-
Poppy Seeds or Sesame Seed Topping:
For added texture and visual appeal, sprinkle poppy seeds, sesame seeds, or even some coarse sea salt on top of your cheese straws before baking. These small additions not only add a delightful crunch but also enhance the overall flavor, balancing out the richness of the cheese.
-
Cheese Straws with a Twist:
For those feeling adventurous, try making your cheese straws with a bit of unexpected flavor. Infuse the dough with a small amount of truffle oil, or incorporate some finely grated lemon zest for a refreshing citrus note. These flavor variations can elevate your cheese straws into something truly special for a festive gathering or dinner party.
By experimenting with different cheeses, herbs, spices, and other ingredients, you can easily adapt Mary Berry’s classic cheese straws recipe to suit any occasion or personal preference.
Storing Leftovers
Mary Berry’s Cheese Straws are often best enjoyed fresh out of the oven, but if you happen to have leftovers, don’t worry! With the proper storage, you can keep them crisp and delicious for a few days, or even extend their shelf life by freezing them for future snacking. Here’s how to store your cheese straws:
-
Room Temperature Storage:
If you plan to eat your cheese straws within a couple of days, storing them at room temperature is perfectly fine. Allow the cheese straws to cool completely before placing them in an airtight container or resealable bag. This will help maintain their crisp texture and prevent them from becoming soggy. Ideally, they should be consumed within 2-3 days.
-
Refrigeration:
If you want to keep your cheese straws a little longer, you can refrigerate them. While refrigeration won’t harm them, it may cause the texture to soften slightly. To store, simply place the cheese straws in an airtight container or wrap them tightly in plastic wrap. They can last in the fridge for about 4-5 days. If you prefer them to be crisper, you can reheat them in the oven for 5-10 minutes at 180°C (350°F) to restore some of their original crunch.
-
Freezing:
For longer-term storage, freezing cheese straws is an excellent option. Once the cheese straws have completely cooled, place them on a baking sheet in a single layer and freeze them for a few hours. This prevents them from sticking together. After they’ve frozen, transfer the cheese straws to a freezer-safe bag or container and store them for up to 2-3 months. When you’re ready to enjoy them, simply bake them straight from the freezer at 180°C (350°F) for about 10-15 minutes until they’re heated through and crispy once again.
-
Reheating:
To bring your stored cheese straws back to life, the best method is to reheat them in the oven. Preheat your oven to around 180°C (350°F), place the cheese straws on a baking sheet, and bake for about 5-10 minutes. This will restore their crunch and enhance the cheese flavor. Alternatively, if you’re in a rush, you can pop them in a toaster oven for a quicker option.
By following these simple steps, you can ensure that your cheese straws stay fresh and enjoyable for as long as possible, allowing you to savor the savory snack at your convenience.
What To Eat With Mary Berry’s Cheese Straws?
Mary Berry’s Cheese Straws are the perfect addition to any meal or snack table, and they pair wonderfully with a variety of dishes and beverages. Here are some excellent options for what to serve with cheese straws:
-
Soup:
Cheese straws are a delightful accompaniment to soups, particularly those with creamy or hearty bases. They can add an extra crunch and flavor dimension to lighter soups such as tomato, but they pair particularly well with thicker soups like leek and potato, butternut squash, or a rich French onion soup. The buttery, cheesy notes of the straws complement the smooth textures of the soup while providing contrast in both taste and texture.
-
Salads:
If you’re serving a light salad, such as a simple mixed green salad or a Mediterranean salad with feta and olives, cheese straws can make an excellent side. Their savory flavor pairs well with the acidity of vinaigrettes and adds a crunchy element to a typically softer dish.
-
Charcuterie Board:
A charcuterie board is an ideal place for cheese straws. Their bite-sized shape makes them easy to pair with cured meats like prosciutto, salami, and chorizo. The flavors of the cheese straws harmonize with the rich and salty meats, creating a balanced taste. Add some pickles, olives, and a variety of cheeses to the board to enhance the flavor experience.
-
Dips and Spreads:
Serve cheese straws with an assortment of dips and spreads for an appetizer or party snack. They pair wonderfully with creamy dips such as hummus, tzatziki, or sour cream and chive dip. A tangy tomato chutney or a spicy mustard can also be served on the side to add a flavorful contrast to the richness of the cheese straws.
-
Wine and Beverages:
When it comes to drinks, cheese straws pair beautifully with wine. A glass of crisp white wine, such as Sauvignon Blanc or Chardonnay, complements the richness of the cheese. If you prefer red, go for a light red wine like Pinot Noir, which won’t overwhelm the flavors of the straws. For a non-alcoholic option, try serving them with a refreshing iced tea or sparkling water with a slice of lemon.
-
Cocktails:
For a more festive affair, serve your cheese straws alongside cocktails. A classic gin and tonic, a light and refreshing mojito, or a dry martini all pair well with the salty, cheesy straws. The bubbly effervescence and the botanical notes of gin enhance the savory richness of the cheese.
-
Sandwiches:
For a satisfying snack or light meal, cheese straws can be paired with open-faced sandwiches or small finger sandwiches. Try them alongside cucumber, smoked salmon, or even a simple cheese sandwich. The crunch of the straws adds texture to the soft bread and fillings.
Conclusion
Mary Berry’s Cheese Straws are the epitome of simple yet sophisticated snacking. Whether you follow the classic recipe or experiment with the variations, these delicious treats can easily be tailored to suit any occasion or personal preference. The beauty of cheese straws lies in their versatility; they can be served as an appetizer, a side dish, or a snack, and they pair wonderfully with a variety of flavors, from soups to charcuterie boards.
Moreover, with easy ways to store leftovers-whether at room temperature, in the fridge, or even frozen-you can ensure that your cheese straws stay fresh for future enjoyment. And if you want to make the most of these delightful bites, consider pairing them with soups, salads, dips, or even your favorite beverage for a truly satisfying experience.
In essence, Mary Berry’s Cheese Straws offer an ideal blend of rich flavor and crisp texture, and with a little creativity, they can be easily adapted to fit any culinary preference. Perfect for casual get-togethers or festive feasts, they’ll surely become a favorite snack in any household.
FAQs
What Ingredients Do I Need For Mary Berry’s Cheese Straws?
To make Mary Berry’s delicious cheese straws, you will need the following ingredients: 225g plain flour, 100g cold butter, 200g strong cheddar cheese (grated), 1 egg yolk, 1 tablespoon of milk, and a pinch of cayenne pepper or paprika for a little spice. These simple ingredients come together to create the perfect crispy and cheesy snack.
How Long Should I Bake The Cheese Straws For?
Mary Berry’s cheese straws should be baked for 12-15 minutes at 200°C (180°C fan) or 400°F, until they turn golden and crisp. The baking time may vary slightly depending on your oven, so keep an eye on them towards the end to prevent burning. If you prefer a crispier texture, you can leave them in for a few extra minutes.
Can I Make The Dough For Mary Berry’s Cheese Straws Ahead Of Time?
Yes, you can prepare the dough ahead of time. After mixing the dough, wrap it in cling film and refrigerate it for up to 24 hours. This will allow the flavors to develop, and the dough will be easier to handle when you roll it out. You can even freeze the dough for up to a month if you want to prepare in advance for future baking!