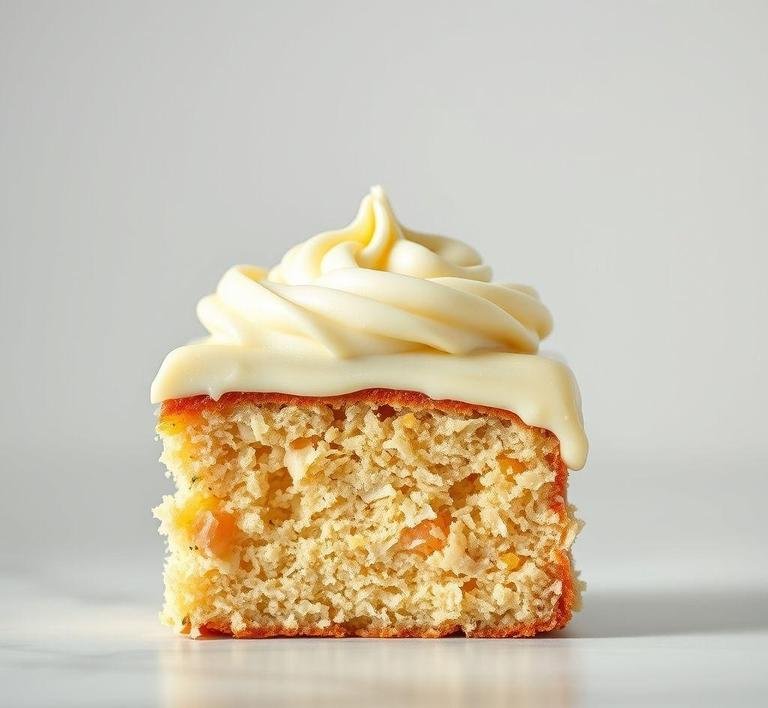
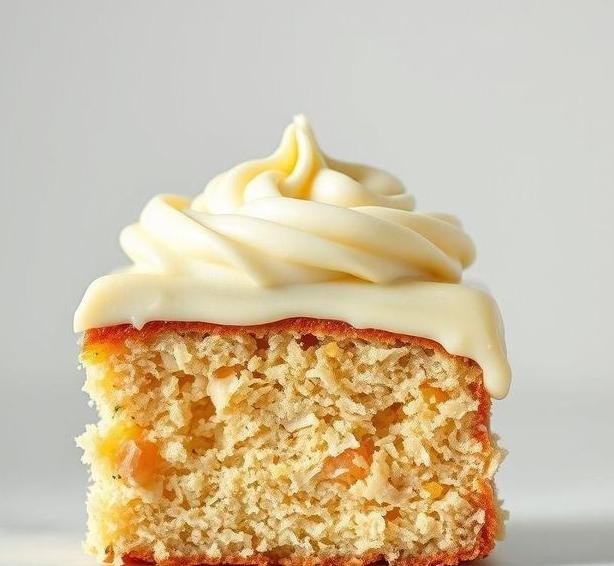
Mary Berry’s White Chocolate Icing is a luscious, smooth, and decadently sweet topping that’s the perfect addition to any dessert. It combines the rich creaminess of white chocolate with the perfect balance of sweetness and texture, creating a velvety finish that elevates cakes, cupcakes, or cookies. Known for her simplicity and elegance, Mary Berry, the renowned British baking icon, has crafted this icing to be both easy to make and irresistibly delicious.
Unlike some icings that can be overly sugary or too dense, Mary Berry’s version is delightfully smooth, making it easy to spread over any surface. The white chocolate adds an indulgent touch, without overwhelming the other flavors of the dessert. Whether you’re baking a delicate sponge cake or preparing a rich fruitcake, this icing complements almost any cake or pastry, adding a layer of glossy perfection that looks as stunning as it tastes.
Mary Berry’s White Chocolate Icing Recipe
Ingredients Needed
To make Mary Berry’s White Chocolate Icing, you’ll need just a few basic ingredients. These are easy to find and don’t require any special equipment, making it a quick and fuss-free way to add a professional touch to your baked goods.
- White Chocolate (200g): The star ingredient! Opt for high-quality white chocolate for the best flavor. Choose a brand with a good balance of sweetness and creaminess. The white chocolate will melt down to form the base of the icing and provide its rich flavor.
- Butter (50g): Unsalted butter is recommended to control the overall saltiness of the icing. The butter adds richness and helps create that silky smooth texture that makes this icing so luxurious.
- Icing Sugar (150g): This is the sweetener of choice. Icing sugar (or powdered sugar) ensures the icing is smooth, lump-free, and easily spreadable. It’s the key ingredient for achieving that glossy, flawless finish.
- Double Cream (50ml): Double cream adds a luscious, creamy texture. This also helps balance the richness of the white chocolate and butter, providing a smooth consistency that’s easy to work with.
- Vanilla Extract (Optional, 1 tsp): While not mandatory, a dash of vanilla extract enhances the overall flavor profile of the icing and adds an aromatic note that complements the white chocolate.
Equipment Needed
The equipment required to make Mary Berry’s White Chocolate Icing is minimal and straightforward. Here’s a list of what you’ll need to prepare the icing:
- Saucepan: For gently melting the white chocolate and butter together.
- Heatproof Bowl: If you prefer to use a double boiler method for melting the chocolate, a heatproof bowl placed over a pan of simmering water works perfectly.
- Wooden Spoon or Spatula: To stir the mixture gently and avoid any air bubbles. A spatula will also help with scraping down the sides of the bowl.
- Whisk: A whisk will come in handy if you’re blending the ingredients together after melting the chocolate. It will ensure everything is evenly mixed and smooth.
- Mixing Bowl: To combine the melted white chocolate mixture with the icing sugar and double cream. This is where you’ll finish the icing process.
- Cooling Rack (Optional): If you’re icing a cake, it’s helpful to let the cake cool completely on a rack before frosting. This ensures the icing doesn’t melt due to any residual heat.
Instructions To Make Mary Berry’s White Chocolate Icing
Making Mary Berry’s White Chocolate Icing is a relatively easy process, but a little patience is required to achieve that smooth, glossy texture. Here’s how to do it step by step:
- Melt the White Chocolate and Butter: Start by placing the white chocolate and butter in a heatproof bowl. Set the bowl over a saucepan of gently simmering water, making sure the bottom of the bowl doesn’t touch the water. Stir occasionally until both the white chocolate and butter have melted together into a smooth, velvety mixture. Alternatively, you can melt them together in a microwave in short bursts, stirring in between.
- Add the Double Cream: Once the chocolate and butter are melted and smooth, stir in the double cream. Continue to stir until the mixture is well combined and the cream has fully incorporated, creating a luscious, glossy base.
- Mix in the Icing Sugar: Sift the icing sugar into the bowl to avoid lumps. Gently fold it into the melted chocolate mixture, using a whisk or spatula. Be sure to fold it in slowly to maintain the smooth texture and avoid any air bubbles from forming.
- Add Vanilla Extract: If you’re using vanilla extract, stir it into the mixture at this point. It’s not necessary but will add a beautiful aromatic flavor that enhances the sweetness of the white chocolate.
- Cool and Use: Let the icing cool to room temperature before using it. If the mixture is too runny, give it a bit more time to cool and thicken. You want a spreadable consistency that’s not too thin but also not too stiff.
- Spread the Icing: Once your icing is at the perfect consistency, spread it over your cooled cake, cupcakes, or cookies. Use a spatula or knife to smooth it out evenly across the top and sides. You can also pipe it for a more decorative finish.
Tips And Tricks
- Quality of White Chocolate Matters: Since the white chocolate is the base of this icing, its flavor and texture will significantly affect the final product. Choose a premium-quality white chocolate with a higher cocoa butter content for the smoothest, creamiest result.
- Don’t Overheat the Chocolate: Melting the white chocolate too quickly or at too high of a temperature can cause it to seize up or become grainy. Always use a gentle heat, whether by a double boiler or microwave, and stir frequently to maintain a smooth consistency.
- Adjust Consistency as Needed: If the icing becomes too thick after cooling, simply add a splash more cream to loosen it up. If it’s too runny, let it cool further to thicken or add a little more icing sugar.
- Piping: For a more intricate, decorative finish, pipe the icing onto your cakes or cupcakes. A piping bag with a star or round nozzle can create beautiful patterns and swirls. Just ensure that the icing is not too runny, or it may not hold its shape.
- Chill the Icing for a Glossy Finish: If you want your icing to set to a glossy finish, you can refrigerate it for about 10-15 minutes before using it on your baked goods. This gives it time to firm up without losing its shine.
Mary Berry’s White Chocolate Icing is a simple yet decadent way to elevate your bakes with minimal effort. With its smooth, rich texture and subtly sweet flavor, it pairs beautifully with everything from light sponges to more robust cakes. Whether you’re new to baking or an experienced home baker, this icing is versatile and adaptable, allowing you to customize it to your taste.
By following the easy-to-master steps and tips shared above, you’ll be able to create a beautifully smooth, glossy finish for all your cake-decorating endeavors. The key to success lies in the quality of ingredients, gentle melting, and perfecting the consistency. It’s a frosting that not only tastes divine but also makes any dessert look professionally decorated. So next time you’re baking, don’t forget to add Mary Berry’s White Chocolate Icing into the mix-it’ll be the perfect finishing touch!
Easy Recipe Variations For Mary Berry’s White Chocolate Icing
Mary Berry’s classic white chocolate icing is an incredibly versatile recipe that can easily be customized to suit a variety of desserts and personal tastes. Whether you’re looking to add a touch of elegance to your cupcakes or experiment with flavor combinations, here are several easy and creative variations you can try.
1. Adding Flavor Extracts:
One of the simplest ways to personalize your white chocolate icing is by adding flavor extracts. While the original recipe has a sweet, subtle flavor profile, flavor extracts allow you to elevate and diversify the taste. You could try adding a teaspoon of vanilla extract for a classic, warm flavor, or opt for almond extract for a hint of nuttiness. Citrus extracts like lemon or orange also pair wonderfully with white chocolate, offering a refreshing contrast to its sweetness. For an even more sophisticated twist, consider infusing the icing with rose or lavender extract for a floral undertone.
2. Infusing with Liqueurs:
For a more grown-up version, why not try infusing the icing with a liqueur? A splash of white rum or a dash of Chambord (raspberry liqueur) can introduce a fruity richness that complements the sweetness of the chocolate. Baileys Irish Cream, with its creamy, coffee-kissed notes, can also add a luxurious depth to the icing. Just be sure to adjust the amount of liqueur carefully, as it can alter the consistency of the icing if too much is added.
3. Adding Fruits or Berries:
You can integrate fresh fruits or fruit purees into the icing for added texture and flavor. Raspberry, strawberry, or even blueberry purees create a fruity contrast to the smooth sweetness of the white chocolate. Additionally, finely chopped fruit like strawberries or blackberries could be stirred into the icing for a bit of crunch and burst of flavor. Be sure to strain the purees before adding them to avoid any excess moisture that might affect the consistency of your icing.
4. Swirling with Other Chocolates:
If you want a beautiful, marbled effect, consider mixing in some dark or milk chocolate. You can melt these chocolates separately and swirl them through the white chocolate icing once it has cooled, creating a stunning visual effect. The contrasting flavors of the dark chocolate and the sweetness of the white chocolate provide a delicious and visually appealing treat. For a fun twist, try using colored candy melts in place of traditional chocolate for a vibrant pop of color that’s perfect for themed parties or holidays.
5. Adding Crunch or Nuts:
For a bit of texture in your icing, you can mix in finely chopped nuts or a crunchy element like crushed praline or pistachios. The smooth, creamy white chocolate icing will contrast beautifully with the added crunch, providing a satisfying bite. If you want to keep it simple, chopped hazelnuts or almonds can lend a nice roasted flavor, while for a more indulgent variation, try adding crushed toffee or caramel for a buttery, caramelized crunch.
Storing Leftovers
Storing leftover Mary Berry’s white chocolate icing properly is essential to maintaining its smooth texture and rich flavor. White chocolate icing is delicate, and its consistency can be easily altered by improper storage or handling, so here are some key tips to ensure it stays fresh:
1. Refrigerator Storage:
If you have leftover white chocolate icing, it’s best to store it in an airtight container in the refrigerator. The cold will help preserve the icing’s freshness and prevent it from melting or becoming too runny. When storing in the fridge, make sure the container is tightly sealed to prevent the icing from absorbing other odors from the fridge. If your icing hardens slightly in the fridge, you can bring it back to room temperature by allowing it to sit out for a while or gently rewarming it over a double boiler, stirring occasionally to restore its creamy texture.
2. Freezing:
For longer storage, freezing is an option. However, it’s important to note that the texture of white chocolate icing can change once frozen and thawed. To freeze, transfer the icing into a freezer-safe container, leaving some space at the top to allow for expansion. Make sure to label the container with the date to keep track of how long it’s been stored. When you’re ready to use it, allow the icing to thaw in the fridge overnight, and once thawed, you may need to re-whisk or briefly reheat it to bring it back to its smooth consistency.
3. Reheating and Restoring Consistency:
If your white chocolate icing thickens too much or hardens after being stored in the fridge, you can restore its original texture by gently reheating it. Use a double boiler or a heatproof bowl set over simmering water, stirring frequently to avoid burning. You can also microwave the icing in short intervals (10-15 seconds) and stir between each session. If necessary, add a tiny bit of cream or milk to loosen the icing if it has become too stiff.
4. Shelf Life:
In the refrigerator, Mary Berry’s white chocolate icing should last for about 5-7 days. If stored in the freezer, it can be kept for up to three months. Always make sure to inspect the icing for any signs of spoilage before using it, such as changes in color or texture, or an off smell. This ensures you’re enjoying it at its freshest.
What To Eat With Mary Berry’s White Chocolate Icing?
Mary Berry’s white chocolate icing pairs perfectly with a wide variety of baked goods, making it a go-to choice for both simple and sophisticated desserts. Whether you’re hosting a party, baking for a special occasion, or just looking for something indulgent to satisfy your sweet tooth, here are some delicious ideas for what to eat with the icing:
1. Cupcakes and Cakes:
The classic pairing for white chocolate icing is, of course, cake. Vanilla or lemon-flavored cakes provide a simple backdrop for the rich sweetness of the white chocolate icing. If you’re feeling adventurous, you can also pair it with a fruit-flavored cake, such as a raspberry or strawberry cake, where the acidity of the fruit complements the creamy sweetness of the icing. Another option is carrot cake or spice cake – their warm, spiced flavors offer a beautiful contrast to the smooth, sweet icing.
2. Brownies:
White chocolate icing adds an indulgent layer to dense, fudgy brownies. The rich, melt-in-your-mouth texture of brownies combined with the smooth icing is a treat that’s hard to resist. You can also use the icing to top blondies, which are the lighter, vanilla-based cousins of brownies. For an extra touch, you could drizzle some white chocolate over the icing or sprinkle some toasted nuts or shredded coconut on top for a bit of texture.
3. Cheesecake:
White chocolate icing can be the perfect topping for a cheesecake. Whether it’s a classic New York-style cheesecake or a fruit-flavored one, the rich, creamy texture of the icing complements the tangy flavor of the cheesecake beautifully. You can either spread the icing on top or use it as a decorative piping around the edges for a polished look.
4. Cookies:
White chocolate icing is also fantastic when paired with cookies. Sugar cookies or shortbread, with their delicate flavors, are excellent companions to the rich icing. You can drizzle the icing on top or dip the cookies into it for an extra layer of sweetness. Another option is to pipe the icing onto the cookies in intricate designs for an elegant finishing touch, especially if you’re preparing cookies for a holiday or special event.
5. Fruit Desserts:
The richness of the white chocolate icing also complements fresh fruits like strawberries, raspberries, or even tropical fruits like mango and pineapple. For a quick dessert, dip fresh fruit into the icing for a delightful treat. Alternatively, you can drizzle the icing over fruit tarts, pavlovas, or fruit-filled pastries for a decadently sweet finish.
Conclusion
Mary Berry’s white chocolate icing is a simple yet luxurious addition to any dessert. Its smooth, creamy texture and rich sweetness make it incredibly versatile, whether you’re using it to top cakes, cupcakes, cookies, or brownies. The easy recipe variations allow you to experiment with different flavors and textures, from infusing it with extracts and liqueurs to adding fruit or nuts. Storing leftovers is a breeze, with both refrigeration and freezing options to keep the icing fresh for days or even months. And when it comes to pairing, the possibilities are endless – from classic cakes and brownies to fruity desserts and cookies, this icing is sure to elevate any treat. Whether you’re hosting a celebration or simply indulging yourself, Mary Berry’s white chocolate icing is the perfect finishing touch to any dessert.
FAQs
What Are The Key Ingredients For Mary Berry’s White Chocolate Icing?
Mary Berry’s white chocolate icing requires simple, high-quality ingredients to ensure a smooth, rich finish. The key ingredients include white chocolate, butter, and icing sugar. For added richness, some recipes suggest a small amount of double cream or milk to help achieve a smooth texture.
Can I Use A Different Type Of Chocolate For The Icing If I Don’t Have White Chocolate?
While Mary Berry’s white chocolate icing recipe specifically calls for white chocolate, you can substitute with milk or dark chocolate if needed. However, the flavor and texture will differ. Milk and dark chocolate have a richer, less sweet taste, which will impact the final outcome. You may also need to adjust the amount of sugar used in the recipe.
How Do I Prevent Mary Berry’s White Chocolate Icing From Becoming Too Runny?
To prevent the icing from becoming too runny, make sure the white chocolate is melted gently over low heat or in short bursts in the microwave to avoid overheating. Once the chocolate is melted, let it cool slightly before mixing with the butter and icing sugar. If it becomes too runny, you can refrigerate the icing for a few minutes to firm it up before using.