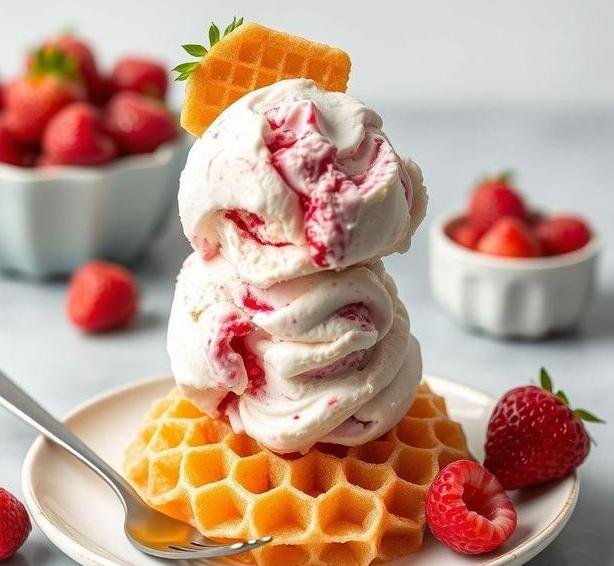
Mary Berry’s Ice Cream Honeycomb is a delightful, homemade frozen dessert that combines the creamy richness of vanilla ice cream with the irresistible crunch and sweetness of homemade honeycomb toffee. Inspired by the iconic British television personality and culinary legend, Mary Berry, this recipe perfectly balances textures and flavors. The smooth, velvety ice cream base pairs wonderfully with the crisp, golden honeycomb, creating a treat that will surely impress anyone who loves indulgent, yet simple desserts.
The beauty of this ice cream lies not just in its flavors but also in its ease of preparation. The honeycomb toffee adds a nostalgic, old-fashioned feel, reminiscent of classic British confections, while the creamy ice cream gives it a modern twist. The beauty of the recipe lies in the way the honeycomb melts into the ice cream, creating pockets of sugary crunch that explode in your mouth with every bite. Whether you serve it during the summer months or as a special treat to round off a hearty meal, this dessert is sure to become a staple in your dessert repertoire.
Mary Berry’s Ice Cream Honeycomb Recipe
Ingredients Needed

To make Mary Berry’s Ice Cream Honeycomb, you’ll need a combination of ingredients for the ice cream itself and the homemade honeycomb. Here’s a breakdown of everything you’ll need:
For The Ice Cream Base
- 600ml Double Cream – This gives the ice cream its rich and luxurious texture. The higher fat content is crucial for achieving a creamy, smooth result.
- 300ml Whole Milk – The milk ensures the ice cream remains smooth and less dense while adding a subtle milky flavor.
- 100g Caster Sugar – To sweeten the ice cream base. The fine texture of caster sugar dissolves well, ensuring the mixture is smooth.
- 1 tsp Vanilla Extract – This adds a lovely aromatic depth, balancing the sweetness of the cream.
- 4 Large Egg Yolks – Egg yolks help emulsify the ice cream base and give it a custardy texture. They also add richness to the flavor.
For The Honeycomb
- 200g Caster Sugar – This is the base for the honeycomb toffee and provides a sweet, caramelized crunch.
- 5 tbsp Golden Syrup – Golden syrup helps the honeycomb achieve its signature chewy, golden color, and adds a delicious, subtle sweetness.
- 1 tsp Bicarbonate of Soda – The magic ingredient that causes the sugar syrup to foam up and create bubbles, resulting in a light, airy texture in the honeycomb.
Equipment Needed
To create this stunning ice cream at home, you will need some key equipment to make the process easier and more efficient. Here’s what you’ll need:
- Heavy-Based Saucepan – To heat the sugar and golden syrup for the honeycomb and ensure that it doesn’t burn.
- Whisk – A balloon whisk is perfect for beating the egg yolks and sugar for the ice cream base and for stirring the mixture as it cooks.
- Mixing Bowls – You will need separate bowls for mixing the cream, milk, and egg yolks for the ice cream base.
- Thermometer – A cooking thermometer helps ensure that your sugar syrup for the honeycomb reaches the correct temperature (around 150°C or 302°F).
- Ice Cream Maker (Optional) – While you can make the ice cream by hand, an ice cream maker helps achieve a smoother consistency and saves you time.
- Baking Tray (for Honeycomb) – A baking tray lined with parchment paper is essential to spread out the honeycomb once it’s made.
- Spatula – For scraping the honeycomb into the baking tray and stirring the ice cream mixture.
Instructions To Make Mary Berry’s Ice Cream Honeycomb
The method to create this mouthwatering dessert involves two main stages: preparing the honeycomb toffee and making the ice cream base. Here’s a step-by-step guide:
Step 1: Make The Honeycomb
- Begin by preparing a baking tray lined with parchment paper. This is where you’ll pour the hot honeycomb mixture.
- In a heavy-based saucepan, add the 200g of caster sugar and 5 tbsp of golden syrup. Gently heat over a low flame, stirring until the sugar dissolves completely.
- Once the sugar has dissolved, increase the heat slightly and bring the mixture to a boil. Allow it to cook for about 4-5 minutes, without stirring, until it reaches a rich amber color (this is when the sugar reaches 150°C/302°F).
- Remove the pan from the heat and carefully whisk in the 1 tsp of bicarbonate of soda. The mixture will bubble up dramatically, so be cautious.
- Quickly pour the bubbly honeycomb mixture onto the prepared baking tray. Allow it to cool and harden for about 30 minutes. Once set, break the honeycomb into large chunks.
Step 2: Prepare The Ice Cream Base
- In a saucepan, heat the 600ml double cream and 300ml whole milk over medium heat. Stir occasionally to prevent it from scorching. You want it to warm up but not boil.
- In a separate bowl, whisk together the 4 egg yolks and 100g caster sugar until pale and thickened.
- Gradually pour the warm milk and cream mixture into the egg yolk mixture, whisking continuously to temper the eggs (this helps avoid curdling).
- Once fully combined, return the mixture to the saucepan. Cook over low heat, stirring constantly with a wooden spoon, until the custard thickens enough to coat the back of the spoon (about 5-7 minutes). Do not allow it to boil.
- Remove the custard from the heat and stir in the 1 tsp of vanilla extract.
- Allow the custard to cool to room temperature, then refrigerate for at least 4 hours or overnight.
Step 3: Churn The Ice Cream
- Once the custard has cooled and thickened, pour it into your ice cream maker and churn according to the manufacturer’s instructions.
- When the ice cream is nearly finished churning, stir in the broken honeycomb pieces.
- Transfer the churned ice cream to a container and freeze for at least 4 hours or until firm.
Tips And Tricks
- Make the Honeycomb Ahead of Time: The honeycomb can be made a day or two in advance, which helps streamline the process. Just store it in an airtight container to keep it fresh and crunchy.
- Use an Ice Cream Maker: While not necessary, using an ice cream maker ensures a smoother, creamier texture by incorporating air into the mixture. If you don’t have one, simply pour the custard into a shallow tray, freeze, and stir every 30 minutes to break up ice crystals.
- Experiment with Flavors: While this recipe is delicious as is, you can also add other mix-ins like chocolate chips, toffee bits, or fruit to customize your ice cream to your taste.
- Avoid Overheating the Custard: When making the ice cream base, always cook the custard on low heat to avoid scrambling the eggs. Patience is key here!
- Serve in Style: Serve this ice cream in individual bowls or cones, garnished with extra pieces of honeycomb or a drizzle of caramel for an extra special touch.
Mary Berry’s Ice Cream Honeycomb is a true showstopper when it comes to homemade frozen desserts. Its layers of creamy vanilla ice cream and crunchy honeycomb create a texture and flavor contrast that makes every bite feel like a treat. By following the steps carefully and utilizing a few key tips, you’ll end up with a rich, velvety ice cream that’s just as good as any store-bought version-if not better. Whether you’re an experienced baker or a novice in the kitchen, this recipe provides the perfect balance of simplicity and indulgence. So go ahead, make this nostalgic ice cream, and enjoy the sweet crunch of honeycomb in every scoop!
Easy Recipe Variations For Mary Berry’s Ice Cream Honeycomb
Mary Berry’s Ice Cream Honeycomb is a delightfully rich dessert, with its creamy texture and satisfying crunch from the honeycomb toffee. But just because the original recipe is already delicious, doesn’t mean it can’t be tailored to suit different tastes or dietary needs. Below are a few easy recipe variations that will add extra fun and flavor to your ice cream creation!
-
Chocolate Honeycomb Ice Cream
For chocolate lovers, try swirling in some melted dark or milk chocolate into the base before adding the honeycomb chunks. This will add depth to the flavor, making each bite even more indulgent. You can also sprinkle mini chocolate chips or cocoa nibs over the top for some extra texture.
-
Fruit-infused Honeycomb Ice Cream
A fruity twist can be introduced by blending in some mashed strawberries, raspberries, or blueberries with the cream mixture. The fruity flavor pairs beautifully with the honeycomb’s caramelized sweetness, creating a well-balanced dessert. If you want to get a bit fancy, you can layer the ice cream with fruit purée for a marbled effect.
-
Nutty Honeycomb Ice Cream
For an added nutty crunch, incorporate chopped toasted almonds, pecans, or hazelnuts into the mixture. These nuts complement the honeycomb’s flavor perfectly, bringing a warm, toasty element to the ice cream. You could even caramelize the nuts to add a sweet and slightly bitter contrast to the rich ice cream base.
-
Vegan Honeycomb Ice Cream
If you are looking for a vegan version of this classic, it’s surprisingly easy to adapt! Replace the cream with full-fat coconut cream or cashew cream for a rich, non-dairy base. To make vegan honeycomb, swap the honey with maple syrup or agave, and ensure the rest of your ingredients are plant-based. This version still offers the same sweet, crunchy texture while being dairy-free.
-
Coffee-Flavored Honeycomb Ice Cream
A coffee variation would be a hit with any caffeine lover. Adding instant coffee or espresso powder to the cream base infuses the ice cream with a rich, robust coffee flavor that pairs wonderfully with the sweetness of the honeycomb. You can even go a step further by adding a shot of coffee liqueur for an adult twist!
These variations allow you to play with the flavor profile of the honeycomb ice cream, adjusting it based on the season, the occasion, or simply your cravings. The options are endless, and part of the joy of Mary Berry’s recipe is how versatile it is for customization.
Storing Leftovers
As much as Mary Berry’s Ice Cream Honeycomb is a crowd-pleaser, there may be times when you have leftovers (though, let’s be honest, that doesn’t happen too often!). Storing leftovers properly ensures that your ice cream stays fresh and enjoyable, even if you don’t finish it all in one sitting.
-
Freezer Storage
The best way to store leftover ice cream is, of course, in the freezer. But there are a few key steps to ensure it stays as creamy and fresh as possible:
- Seal Properly: Place the ice cream in an airtight container to protect it from freezer burn and odors. If you don’t have an airtight container, you can wrap the ice cream tightly in plastic wrap, ensuring there are no air pockets.
- Smooth Surface: Press a piece of parchment paper or wax paper directly onto the surface of the ice cream before sealing the container. This helps prevent ice crystals from forming and preserves the texture of the ice cream.
- Storage Time: While the ice cream can stay in the freezer for up to 2-3 weeks, it’s best consumed sooner rather than later for optimal freshness. The honeycomb can sometimes lose its crunch if it sits for too long, so aim to finish it within a week if possible.
-
Individual Servings
If you want to store individual portions, you can scoop the ice cream into smaller portions (using an ice cream scoop or spoon) and wrap each serving in wax paper or plastic wrap. These can then be placed in a larger container, so you only defrost what you need. This method ensures minimal exposure to air and keeps the honeycomb crisp.
-
Thawing
When you’re ready to enjoy your leftovers, remove the ice cream from the freezer and let it sit at room temperature for 5-10 minutes to soften slightly. This makes scooping much easier without causing the honeycomb to break down too much. Avoid microwaving or using hot water to defrost it, as this will compromise the texture.
By following these simple storage guidelines, you’ll ensure that your leftover ice cream is just as delightful as the first serving. Plus, having a stash of homemade honeycomb ice cream on hand is always a good idea for impromptu dessert cravings.
What To Eat With Mary Berry’s Ice Cream Honeycomb?
Mary Berry’s Ice Cream Honeycomb is delicious on its own, but it can also be paired with various desserts or sides to create a truly indulgent experience. Here are a few ideas of what to serve alongside it for the ultimate treat:
-
Warm Desserts
Serving the ice cream with something warm is a classic dessert pairing. Think about:
- Hot Fudge Brownie: A rich, gooey brownie topped with a scoop of cold honeycomb ice cream and drizzled with hot fudge sauce. The contrast between the warm brownie and the cold, creamy ice cream is irresistibly good.
- Apple Pie: The cinnamon and tartness of a freshly baked apple pie pairs beautifully with the sweet, crunchy honeycomb ice cream. The combination of textures and flavors will satisfy your sweet tooth.
-
Fruity Sides
Fresh fruit offers a refreshing contrast to the richness of the ice cream. Consider serving the honeycomb ice cream with:
- Mixed Berries: A medley of raspberries, strawberries, and blueberries adds brightness and a slight tartness that balances the sweetness of the ice cream.
- Poached Pears: Gently poached pears in red wine or vanilla syrup bring out a soft, luxurious flavor that enhances the creamy texture of the ice cream.
-
Crispy Biscuits or Cookies
For added crunch, serve Mary Berry’s Ice Cream Honeycomb alongside a few crispy biscuits or cookies:
- Shortbread: The buttery richness of shortbread biscuits complements the honeycomb perfectly.
- Ginger Snap Cookies: The slight spice of ginger snaps offers an interesting flavor contrast, and the crisp texture provides a delightful crunch alongside the ice cream.
-
Caramel or Toffee Sauces
A drizzle of warm caramel or toffee sauce on top of the ice cream brings a depth of flavor, intensifying the honeycomb’s natural sweetness. You can even sprinkle a little sea salt on top for a salted caramel effect, which provides a savory edge to the sweet dessert.
Conclusion
Mary Berry’s Ice Cream Honeycomb is a true classic that brings together the best of creamy, velvety ice cream with the irresistible crunch of homemade honeycomb. It’s an indulgent, delightful dessert that can easily be personalized with various flavor variations to suit your tastes, from chocolate and fruit-infused versions to vegan-friendly twists.
Storing leftovers is a breeze with just a few simple steps to preserve the texture and flavor. And when it comes to pairing, there’s no shortage of options to elevate the dish-whether you’re serving it with warm desserts, fresh fruits, or crunchy biscuits.
Ultimately, this recipe is more than just a sweet treat; it’s an experience that brings joy with every bite. Whether you’re enjoying it as-is or experimenting with your own variations, you’ll find that Mary Berry’s Ice Cream Honeycomb is a showstopper that deserves a place in any dessert lover’s recipe collection.
FAQs
What Ingredients Are Required For Mary Berry’s Ice Cream Honeycomb Recipe?
To make Mary Berry’s ice cream honeycomb, you’ll need the following ingredients: double cream, whole milk, caster sugar, honey, and homemade honeycomb. For the honeycomb, you’ll need caster sugar, golden syrup, bicarbonate of soda, and butter. It’s a simple yet indulgent combination that creates a creamy, crunchy dessert.
How Do You Make The Honeycomb For Mary Berry’s Ice Cream Recipe?
To make the honeycomb for Mary Berry’s ice cream, start by melting caster sugar and golden syrup in a saucepan over low heat. Once melted, bring it to a boil until it reaches a deep amber color. Then, stir in the bicarbonate of soda and butter, which will cause the mixture to bubble up. Pour the mixture onto a lined baking sheet and let it cool and set before breaking it into pieces to add to the ice cream.
Can I Substitute Ingredients In Mary Berry’s Ice Cream Honeycomb Recipe?
While it’s always best to follow Mary Berry’s recipe for the most authentic results, you can make a few substitutions. If you can’t find double cream, you could use heavy cream instead. You can also swap whole milk with semi-skimmed milk for a lighter version. However, when it comes to the honeycomb, it’s essential to use the right sugar and syrup to achieve that perfect crunchy texture, so avoid substituting those ingredients for the best result.