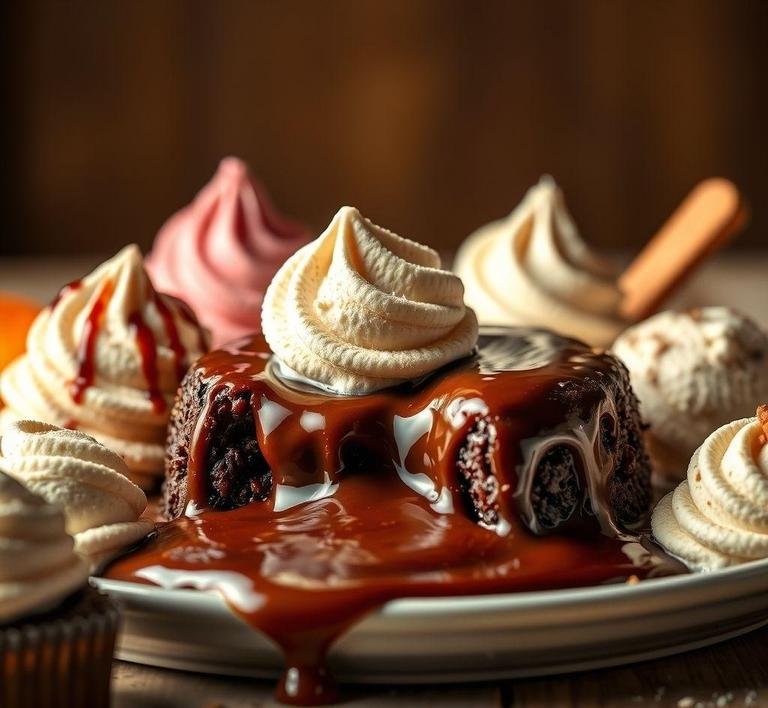
Mary Berry’s Melting Moments are a delectable treat that epitomizes the essence of British baking: simple, elegant, and utterly delicious. These little cookies are light, buttery, and melt-in-your-mouth, as their name so charmingly suggests. The texture is soft and crumbly, with the perfect balance between sweetness and richness. The melting effect occurs because of the generous amount of butter in the dough, which gives these biscuits a wonderfully tender, delicate texture. Typically, they are sandwiched with a rich buttercream filling, which enhances the cookies’ indulgent quality.
Berry’s Melting Moments are the kind of biscuit that can be made for a casual afternoon tea or as a treat to impress at a gathering. They evoke a sense of nostalgia-like the kind of baked goods your grandmother might have made. The buttery aroma that fills the kitchen while baking these is enough to make anyone feel cozy and welcome. With a short, crisp crunch from the cookies and a smooth creaminess from the filling, these biscuits are a comforting bite of sweetness.
Mary Berry’s Melting Moments Recipe
Ingredients Needed
The ingredients for Mary Berry’s Melting Moments are straightforward, and most of them are pantry staples. However, their simplicity is what makes this recipe so wonderfully accessible while still delivering a high-quality result. Here’s what you’ll need:
- Plain flour: This is the base for your biscuits. Plain flour ensures the cookies have the right balance of lightness without being too dense.
- Cornflour (cornstarch): The cornflour plays a pivotal role in making the biscuits extra delicate. It helps break down the gluten in the flour, which results in a melt-in-your-mouth texture.
- Butter: Unsalted butter is preferred to control the level of saltiness in the biscuits. Butter provides the rich, creamy flavor and is the star ingredient that makes these cookies so tender.
- Icing sugar (powdered sugar): For sweetness and to ensure a smooth, fine-textured dough. Icing sugar will also give the cookies a soft, almost delicate crunch when baked.
- Vanilla extract: The perfect addition to give your biscuits a subtle but aromatic flavor that enhances the richness of the butter.
- Buttercream (for filling): The buttercream filling is what truly elevates the Melting Moments. It typically consists of icing sugar, softened butter, and a splash of vanilla extract. The filling’s smooth texture and sweetness contrast beautifully with the cookies’ light, crumbly texture.
Equipment Needed
Making Mary Berry’s Melting Moments requires a few essential kitchen tools to ensure everything turns out perfectly. Here’s what you’ll need:
- Mixing bowl: A large enough bowl to mix your dough comfortably.
- Electric mixer or hand whisk: While you can mix by hand, an electric mixer or hand whisk will speed up the process and create a smoother, fluffier dough and buttercream filling.
- Baking trays: A couple of baking trays to arrange your cookies on. If you don’t have parchment paper, lining the trays with it is highly recommended to prevent sticking and ensure an even bake.
- Piping bag (optional): While Mary Berry’s Melting Moments can be assembled by simply spreading the buttercream, using a piping bag gives a more elegant, professional touch.
- Teaspoon or small ice cream scoop: To measure the dough out evenly, ensuring uniform-sized cookies. This will help the biscuits bake at the same rate.
- Cooling rack: After baking, the cookies need to cool down completely on a wire rack to preserve their delicate texture.
Instructions To Make Mary Berry’s Melting Moments
- Prepare your oven and trays: Preheat your oven to 170°C (340°F) for fan-assisted ovens, or 190°C (375°F) for conventional ovens. Line two baking trays with parchment paper or a silicone baking mat for easy removal of the cookies.
- Mix the dough: In a large bowl, sift together the plain flour and cornflour. Then, add the softened unsalted butter and icing sugar to the bowl. Use an electric mixer to beat everything together until the mixture becomes soft, smooth, and creamy. Add the vanilla extract and beat again until evenly combined.
- Shape the biscuits: Using a teaspoon or small ice cream scoop, take small portions of dough and roll them into balls. Place them onto the prepared baking trays, spacing them about 2.5 cm (1 inch) apart, as they will spread slightly during baking.
- Flatten the dough: To achieve the signature Melting Moments look, gently flatten each dough ball with a fork or your fingers. This step helps ensure they bake evenly and gives them that lovely, delicate appearance.
- Bake: Place the trays in the preheated oven and bake for 10-12 minutes, or until the edges of the biscuits are lightly golden. Be careful not to overbake them as they should remain soft and crumbly.
- Cool the biscuits: Once baked, remove the trays from the oven and allow the biscuits to cool for a few minutes on the tray. Then, carefully transfer them to a wire cooling rack to cool completely. Don’t rush this step-cooling is crucial to maintaining the texture of the biscuits.
- Prepare the buttercream filling: While the biscuits are cooling, make the buttercream. In a separate bowl, beat together the softened butter and icing sugar until smooth and creamy. Add a few drops of vanilla extract and beat until well combined. If you’d like, you can add a little milk to loosen the buttercream to your desired consistency.
- Assemble the biscuits: Once the biscuits are completely cooled, turn half of them upside down. Pipe or spread a small amount of buttercream onto each biscuit, then top with the remaining biscuits to create a sandwich. Gently press them together to help the filling spread evenly.
- Serve and enjoy: Your Melting Moments are ready to be served! Enjoy them with a cup of tea, coffee, or just as an indulgent treat whenever the mood strikes.
Tips And Tricks
- Softened butter is key: Make sure the butter is softened to room temperature before using it. This ensures it blends easily into the dough and creates that delicate, melt-in-your-mouth texture.
- Don’t overwork the dough: While mixing, try not to overwork the dough, as this can cause the biscuits to become dense. The dough should be just mixed until combined.
- Chill the dough: If the dough feels too soft to shape or work with, pop it in the fridge for about 30 minutes. This will firm it up and make the shaping process easier.
- Customize your filling: If you want to add a little twist to the buttercream, you can flavor it with lemon zest, orange zest, or even a touch of cocoa powder for a chocolatey version.
- Make ahead: The Melting Moments can be baked a day or two in advance. Store the cooled biscuits in an airtight container to maintain their freshness, and assemble them just before serving.
- Don’t rush the cooling process: Allow the biscuits to cool completely before sandwiching them with the buttercream, as warm cookies can cause the filling to melt or make the cookies too soft.
Mary Berry’s Melting Moments are a delightful and deceptively simple treat that offers a burst of flavor in every bite. The combination of soft, crumbly cookies and rich, creamy buttercream is an irresistible pairing that’s sure to please both novice bakers and experienced pastry chefs. With just a few quality ingredients and straightforward instructions, you can recreate these delectable biscuits at home and enjoy them at any time of day-whether you’re sipping tea in the afternoon or indulging your sweet tooth after dinner.
These biscuits not only serve as a reminder of the comforting nature of traditional British baking but also offer a chance to experiment with flavors and fillings. Whether you keep them classic with vanilla buttercream or add your own personal touch, Mary Berry’s Melting Moments will always be a hit at the table. So, roll up your sleeves, grab your mixing bowl, and get ready to enjoy one of the most charming bakes the UK has to offer!
Easy Recipe Variations For Mary Berry’s Melting Moments
Mary Berry’s Melting Moments are a classic treat that’s known for their delicate, crumbly texture and rich, buttery flavor. While the original recipe is delicious, there are a variety of ways to put your own spin on these sweet biscuits. Here are some easy recipe variations that can elevate the classic melting moments to new levels of deliciousness.
1. Chocolate Melting Moments
For chocolate lovers, adding cocoa powder to the dough can create a rich, dark version of the classic biscuit. Simply replace about 2 tablespoons of the plain flour with unsweetened cocoa powder. You could also dip the cooled biscuits in melted chocolate for an extra layer of indulgence. A sprinkle of sea salt on top can add a sophisticated twist and contrast to the sweetness.
2. Lemon Or Orange Zest Melting Moments
To add a refreshing citrusy zing to the biscuits, grate some lemon or orange zest into the dough. This adds a fresh, aromatic quality that pairs perfectly with the buttery flavor. For an extra burst of citrus, sandwich the biscuits with a citrus-flavored cream, like lemon curd or orange buttercream.
3. Vanilla And Raspberry Melting Moments
Instead of the traditional filling, why not opt for a fruity version? Add a tablespoon of raspberry jam to the center of the biscuit before baking, or use raspberry puree in the filling for a tangy, sweet contrast to the buttery biscuits. The combination of vanilla and raspberry is a timeless pairing that is sure to impress.
4. Nutty Melting Moments
Incorporating nuts can add texture and depth of flavor to your Melting Moments. Finely chopped pistachios, hazelnuts, or almonds can be added to the dough for a bit of crunch. You could even dust the biscuits with chopped nuts after they’ve been filled for an extra bite. The nutty flavor adds a delightful contrast to the soft, melt-in-your-mouth biscuit.
5. Coffee Melting Moments
For coffee enthusiasts, adding instant coffee or espresso powder to the dough can give the biscuits a deep, rich flavor. You could sandwich them with a coffee-flavored buttercream or chocolate ganache to complement the bitterness of the coffee. A light dusting of cocoa powder can add a touch of elegance, making them a perfect afternoon indulgence.
6. Spiced Melting Moments
For those who enjoy warm, comforting spices, you can add a pinch of cinnamon, ginger, or nutmeg to the dough. This will create a cozy, seasonal twist perfect for autumn or the holiday season. The warm spices in combination with the buttery dough are like a hug in cookie form. A spiced cream cheese filling would elevate this even further.
Storing Leftovers
As with most baked goods, Mary Berry’s Melting Moments are best enjoyed fresh, when their crumbly texture is at its finest. However, if you find yourself with leftovers (which is rare but can happen!), storing them properly will ensure they stay fresh and delicious for a little longer.
1. Room Temperature Storage
If you’ve made a large batch of Melting Moments and want to keep them for a few days, the best option is to store them in an airtight container at room temperature. They should stay fresh for up to 3 days. Be sure to separate the biscuits with a layer of wax paper or parchment to prevent them from sticking together.
2. Freezing
For longer storage, Melting Moments can be frozen. To freeze, first allow the biscuits to cool completely. Then, place them in a single layer on a baking tray and freeze them for about 1 hour. Once frozen solid, transfer the biscuits to a resealable freezer bag or airtight container. They can be frozen for up to 3 months. When ready to eat, simply thaw them at room temperature for about 30 minutes, and they’ll taste almost as fresh as when they were first baked.
3. Avoiding Soggy Biscuits
If you’ve already sandwiched your Melting Moments with cream or butter, it’s best to store them in the fridge rather than at room temperature, as the filling can soften and cause the biscuits to lose their texture. You can also freeze the filled biscuits, but be mindful that the filling might change texture upon thawing.
What To Eat With Mary Berry’s Melting Moments?
Mary Berry’s Melting Moments are versatile treats that can pair with a variety of other foods and beverages. Whether you’re enjoying them as a light afternoon snack or presenting them at a gathering, here are a few ideas on what to serve them with:
1. Tea And Coffee
These biscuits are a classic pairing for a hot cup of tea or coffee. Their buttery flavor complements a strong black tea like English Breakfast or Earl Grey. For coffee lovers, a cup of espresso or a creamy cappuccino pairs perfectly with the richness of the Melting Moments. You could also experiment with flavored teas, such as a floral jasmine or a fruity berry blend, to add a new twist to the experience.
2. Fresh Fruit
Serve Melting Moments alongside a platter of fresh fruit to balance out the richness of the biscuits. Sliced strawberries, grapes, or citrus fruits like oranges and lemons provide a refreshing contrast to the buttery sweetness of the cookies. The acidity of the fruit will cleanse your palate between bites of the creamy filling.
3. Ice Cream Or Sorbet
For a more indulgent treat, pair your Melting Moments with a scoop of ice cream or sorbet. A scoop of vanilla, pistachio, or coffee ice cream works beautifully, while fruity sorbets (such as lemon or raspberry) bring a bright and refreshing element to the dessert. You could even turn it into an ice cream sandwich by placing a scoop of ice cream between two biscuits for a decadent bite.
4. Cheese Plate
If you’re serving Melting Moments at a more sophisticated gathering, a cheese plate with a selection of mild cheeses can be a surprising but delightful pairing. Soft cheeses like brie or camembert, along with a tangy goat cheese, can complement the sweet, buttery biscuits without overwhelming the palate.
5. Whipped Cream Or Custard
A dollop of freshly whipped cream or a side of custard adds a luxurious touch to your Melting Moments. This is especially delicious if you’ve gone for a fruity filling in the biscuits, like lemon or raspberry. The creaminess of the whipped cream or custard adds another level of richness that enhances the flavor of the biscuits.
Conclusion
Mary Berry’s Melting Moments are an irresistible treat that are both easy to make and highly customizable. Whether you choose to stick with the classic buttery version or explore some fun variations, they’re guaranteed to please anyone with a sweet tooth. They pair wonderfully with a variety of beverages, fresh fruit, or even indulgent desserts like ice cream. When stored properly, they can last for a few days or be frozen for later enjoyment. Whether you’re hosting a tea party or simply looking for a delicious snack, these biscuits are sure to impress with their melt-in-your-mouth texture and delightful flavor. So, don’t hesitate to get creative with variations and toppings, and enjoy the magic of Mary Berry’s Melting Moments in all their glorious forms.
FAQs
What Are Melting Moments In Mary Berry’s Recipe?
In Mary Berry’s recipe, melting moments are a type of delicate, buttery biscuit that literally ‘melt’ in your mouth. The cookies are made using a combination of butter, flour, cornflour, and sugar, resulting in a soft, crumbly texture. Often sandwiched together with a creamy filling such as buttercream or jam, these biscuits are a popular treat for afternoon tea.
Can I Make Mary Berry’s Melting Moments Gluten-free?
Yes, you can make Mary Berry’s melting moments gluten-free by substituting the regular flour with a gluten-free flour blend. It’s important to use a good quality blend that includes xanthan gum, which will help the structure of the biscuits. Additionally, check the filling ingredients, such as the buttercream or jam, to ensure they are gluten-free as well.
How Can I Prevent Mary Berry’s Melting Moments From Spreading Too Much While Baking?
To prevent Mary Berry’s melting moments from spreading too much during baking, ensure that the dough is chilled before shaping the biscuits. After preparing the dough, wrap it in cling film and chill it in the fridge for at least 30 minutes. Additionally, make sure your baking sheets are properly lined with parchment paper, and avoid greasing them as it could cause the biscuits to spread. Lastly, bake at the recommended temperature to maintain control over the spread.